Thresholds are an advanced feature available to all Scrutinizer users. When applied correctly, they can be used to automatically send notification of potential problems on network devices. In this post, I would like to explain how to properly set the interface utilization threshold.
Scrutinizer uses the SNMP poller to determine the link speed (commonly referred to as ifSpeed) of an interface (this can also be changed manually per interface). When the percent of utilization reaches a specific level, an alarm is triggered to indicate high utilization. Depending on your link speed, you may want to increase or decrease this level. For example, if a majority of your interfaces have 1GbE capacity, a 90% threshold would only be reached when 900Mbps is reached. This is a significant amount of traffic and would likely cause problems long before the threshold is reached. You can imagine similar issues on 10 GbE connections.
In order to set the global (utilization) threshold, navigate to the Admin tab. From there, select Settings. In the dropdown select System Preferences. Threshold preferences are adjusted within these settings. Near the bottom of the preference options you will see “Threshold – Utilization”. This is the global threshold that, when reached, will trigger an alarm in Scrutinizer. As stated earlier in this post, it is best to set this according to what makes the most sense concerning your interfaces.
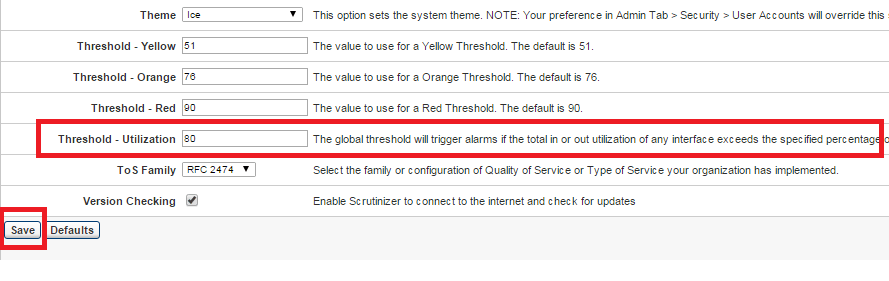
Now, you may have noticed that there are three other threshold options available. These options determine when various links change color. For example, the default for yellow is 51 percent; therefore, if the percent of utilization of your WAN link goes beyond 50% of the total interface speed, then the links indicating this will turn yellow. Let’s go back a bit, though. I previously stated that the interface was determined by the ifSpeed via SNMP. What if the ifSpeed is wrong? I may be using a 1GbE interface for my WAN link, but I certainly don’t have that kind of bandwidth.
Changing the interface speed to reflect actual bandwidth
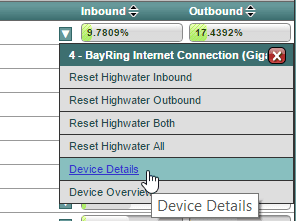
Changing the speed to properly reflect bandwidth on each interface is a simple process. To do so, navigate to the Status tab. From there, locate the interface you want to change. Once you see the interface, select the down caret next to the inbound column.
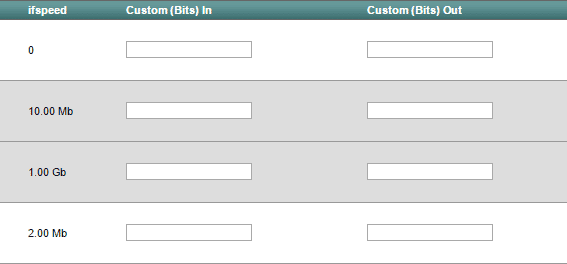
From this page, you will see two columns: Custom (Bits) In and Custom (Bits) Out. These are the fields that you need to change to properly update the interface speed. It will also provide the speed pulled via SNMP. If you have a 20Mbps connection on your 1GbE, for example, you need to enter 20000000 in the field.
Now that you have the actual bandwidth set for the interface, your graphs and other reports will be accurate and provide you with the best details.
If you need any help getting this set up, give one of our support team members a call.