I’ve heard Azure used quite a bit lately as a place to host and manage virtual machines. Azure launched console access in March of 2018. Since then, deploying VMs that require initial setup has become much easier. Now, even though Azure is not a Scrutinizer supported platform, our customers have been able to successfully deploy the new VM from within Azure.
Getting started to deploy Scrutinizer in Azure
Again, Azure is not a Scrutinizer supported platform, so we do not have a native image for Azure. Our Hyper-V image will work just fine, but will first need to be converted from a dynamic VHD to a fixed VHD.
- Request the current Virtual Hyper-V image from our support team.
- Download and extract the ZIP file.
- Follow Microsoft’s documentation on converting VHDs to fixed.
- Open the Azure web portal (http://portal.azure.com).
- Log in as your Azure user.
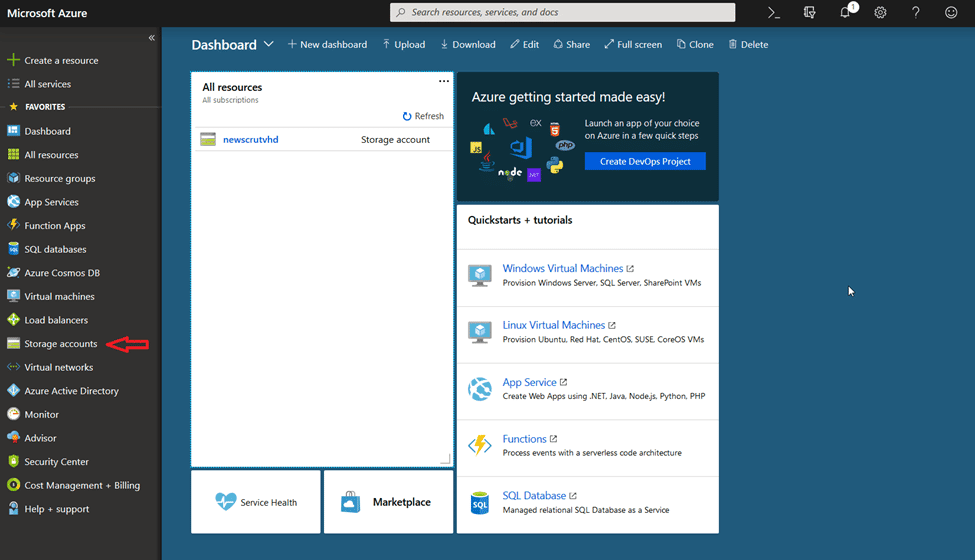
- From here, navigate to Storage Accounts. You can select an existing storage account, or create a new storage account.
For this example, we will be creating everything as if it were new.
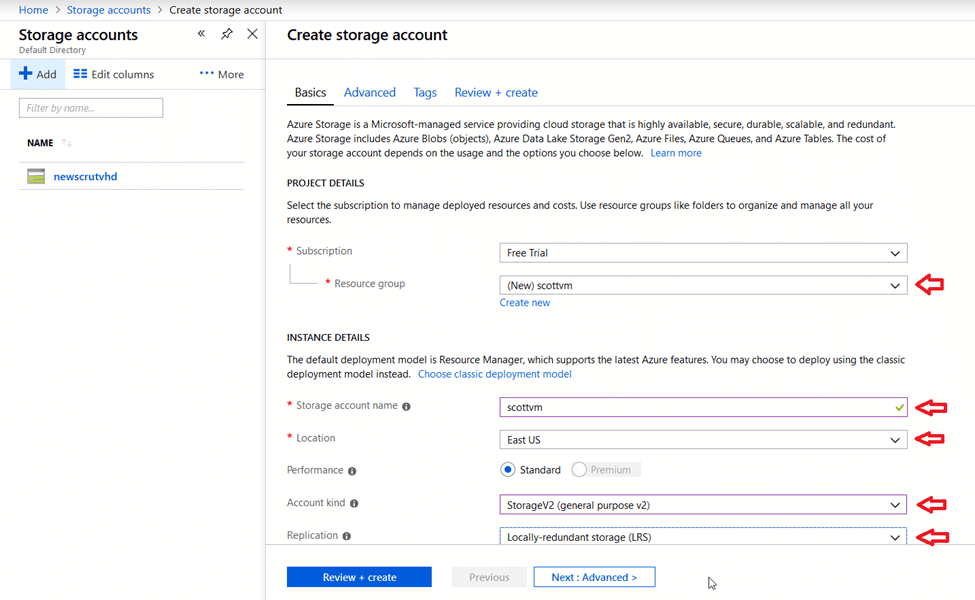
Create a new storage account
Select “Add” in the upper left-hand corner to create a new storage account.

Use an existing resource group or create a new one
Create a new resource group.
- Begin by assigning the storage account a name.
- Next, select the region you will be deploying in.
- Select the account type (in this case, StorageV2).
- Finally, select the Replication type.
Blob & container creation
- Open your new storage account to create a Blob (in case you’re curious, “Blob” stands for Binary Large Object).
- In the left menu for the storage account, scroll to the Blob service section, then select “Blobs.”
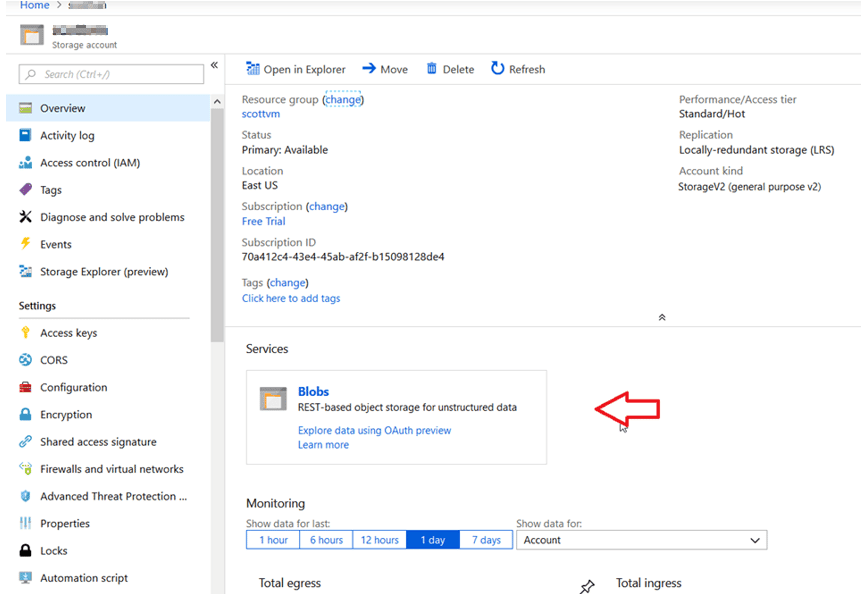
- Select “+Container.”
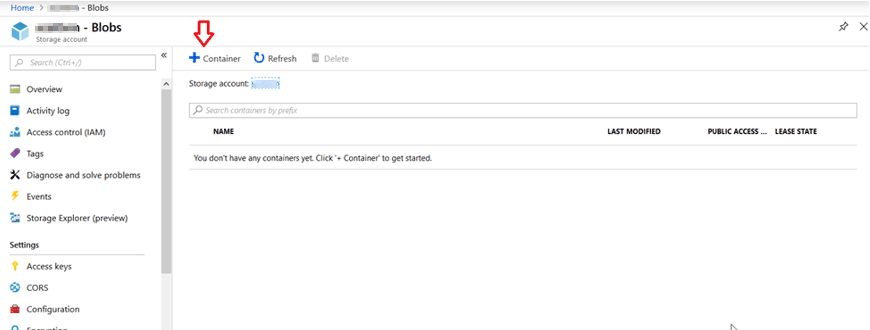
- Create a name for your new container. (Keep in mind that the name must all be lowercase and can only contain letters, numbers, and hyphens).
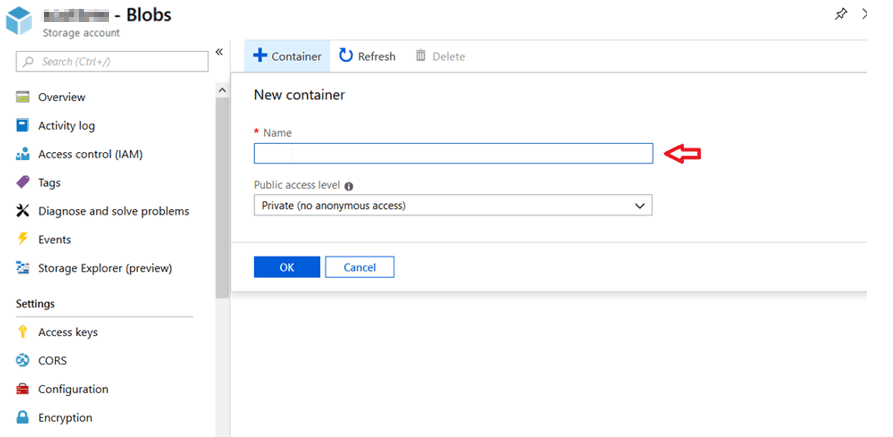
- Check what level of access you would like the container to have. By default, it is set to private.
- Select “OK” to complete the container creation.
Continue with deployment
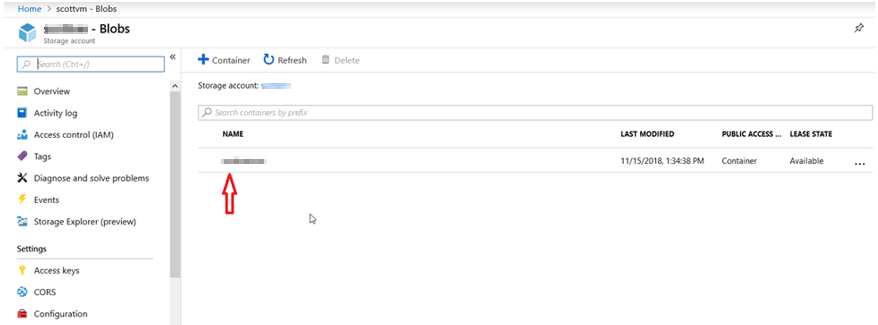
- Select the new container and select “upload” to begin the process of uploading the new image.

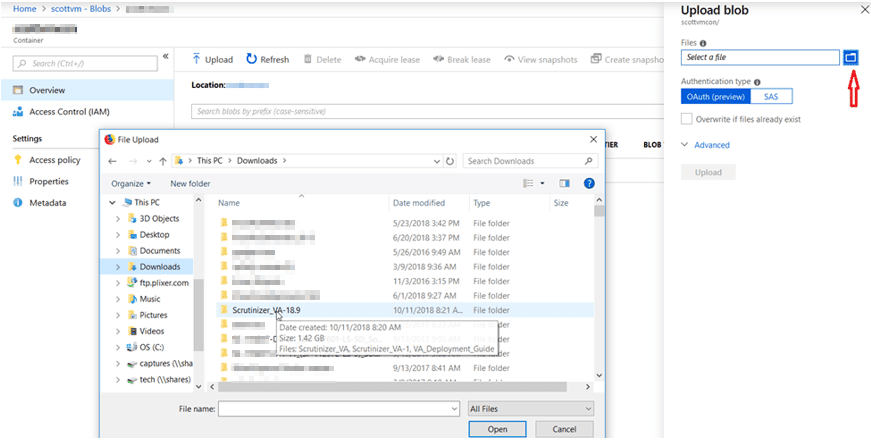
- Use browse to select the .VHD disk image.
- Name the image and upload the file.
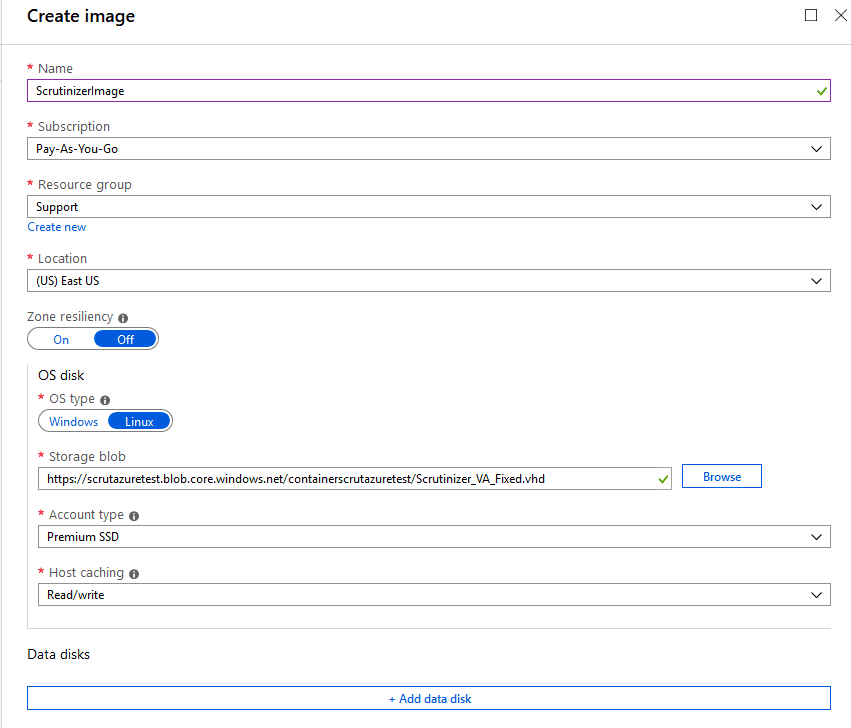
- Create the image From Home, use the search bar to bring up images. Select Add to create an image. Be sure to answer each field and to select the storage blob you recently created.
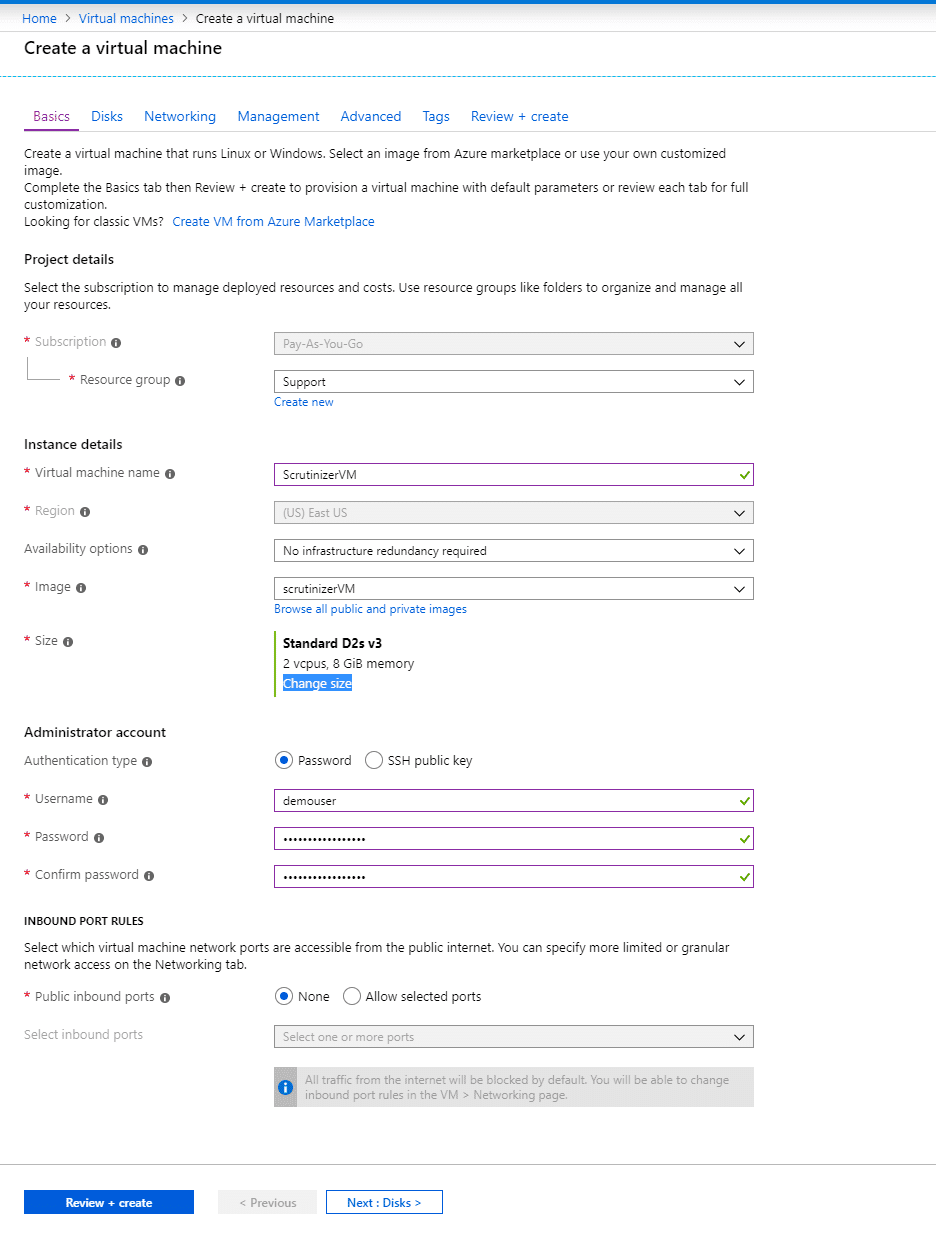
- Next, create the virtual machine. Under Home > Virtual Machines, select Add to create a virtual machine. Be sure to select the image you just created.
Now you should be able to access the appliance through the console for initial setup.
Opening the console in Azure
- From within the Azure portal, select “Virtual Machines” on the menu to the left.
- Select the new virtual machine from the list. This will open the overview page for the VM.
- Navigate to the “Support + Troubleshooting” section and select “Serial Console.” This will create a new pane with the console open.
(For more information regarding navigating Azure’s serial console please follow their documentation here: Azure Console.)
Once you’ve got console access, you can continue the initial setup of Scrutinizer. Please check our Scrutinizer Installation Guide to review system requirements.
Now that you’ve got Scrutinizer up and running, take a look at our blogs like Real-Time DDos Detection & Analysis or How to Filter Network Traffic . Reach out to us to help you get the most from your NetFlow data!
Updated 7/15/19.


