In a previous post, we described how to search for NATed traffic within Scrutinizer. No matter which solution you are using to collect NetFlow and metadata, you’ve likely noticed that when your firewall creates a NAT address, that address becomes the source and destination within your flows. This makes your flow data less useful. In this post, I’ll share how you can better leverage your flow and metadata to see exactly which devices on your network are making external requests. In addition, I will provide an updated guide on how to search for devices and IP in Scrutinizer. Given that the last post was back in 2009, many things have changed!
Network Address Translation, NAT for short, is a “method of remapping one IP address space into another by modifying network address information in Internet Protocol (IP) datagram packet headers while they are in transit across a traffic routing device.” This means that you can assign your public IP to a much larger number of machines inside your network. They actually “share” this same IP space. In practical terms, all of your internal devices connecting to the internet appear to come from a single device.
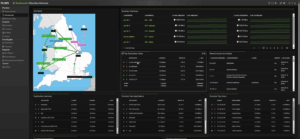
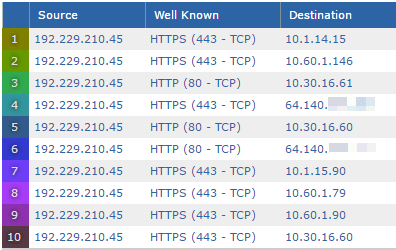
With this in mind, let’s look at how this looks from the standpoint of your externally-facing firewall.
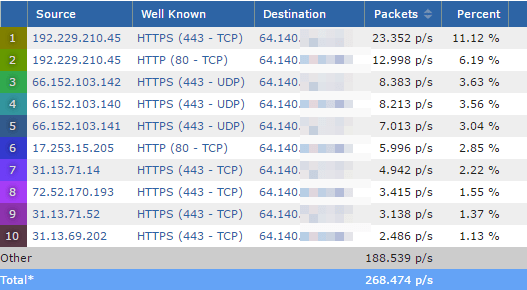
In Figure 1, there are a series of conversations with a source from external (web) traffic. The destination for each of these conversations, however, is the corporate firewall’s IP address (64.140.x.x). Since 192.229.210.45 is the highest usage in this series, let’s take a deeper look at that traffic to see which destination host within our network is generating it.
Firstly, because these conversations are from records generated by the internet router, the traffic has already been NATed by the time it reaches the firewall. Therefore we should find this traffic before it gets to the router.
Searching for the originating device
The best way to find the source of internet-bound traffic is to do an Exporter search.
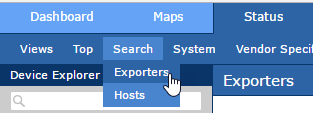
To do this, navigate to the Status tab in Scrutinizer, select the Search option below the tab, and then choose Exporters.
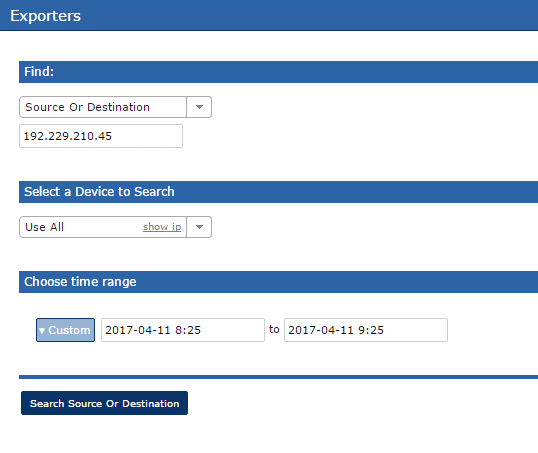
Once you’re in the search area, all you need to do is choose the Source Or Destination option and enter the IP address of the traffic you wish to investigate. After you click the Search Source Or Destination button, a report will display the actual internal source of the traffic.
And that’s it. You now know how to find the internal (originating) IP/device that was NATed at the firewall.
If you have a device like a Palo Alto Networks’ firewall or a Cisco ASR, you can take advantage of their built-in NAT data from the flow export. Check out the links to those devices to learn more about their NAT support.