One of the perks of working in technical support is learning something new every day. For instance, just earlier today I was on a call with a customer who wanted to make sure that Scrutinizer supports Viptela SD-WAN IPFIX exports. My colleague James Lawrence had previously touched upon Viptela IPFIX support, so I thought that I would take this opportunity to provide a configuration guide for you.
What is cflowd traffic flow monitoring?
Cflowd traffic flow monitoring is equivalent to Flexible NetFlow. Version 10 is defined in RFC 7011 and RFC 7012 and is referred to as the IP Flow Information Export (IPFIX) protocol. Cflowd can track GRE, ICMP, IPsec, SCTP, TCP, and UDP flows.
Cflowd monitors traffic flowing through vEdge routers in the overlay network and exports flow information to a collector. For a traffic flow, cflowd periodically sends template reports to a flow collector. These reports contain information about the flow and data extracted from the IP headers of the packets in the flow. Data about all flows is aggregated in the cflowd records. Flows are not sampled, and vEdge routers do not cache any of the records that are exported to a collector.
Option templates are not supported. The source IP address for the packet containing the IPFIX records is randomly selected from any of the interfaces in the VPN. The flow records are exported via TCP or UDP connections. Anonymization of records and TLS encryption are not performed. It is assumed that the collector and the IPFIX analyzer are both located within the data center and that the traffic traveling within the data center is safe.
How to configure Viptela IPFIX exports
These are the steps to configure cflowd using centralized data policy.
Step 1: Launch the Policy Configuration Wizard
In vManage NMS, select the Configure >Policies screen. When you first open this screen, the Centralized Policy tab is selected by default. Click Add Policy.
Step 2: Create Applications or Groups of Interest
Create a new list as shown below.
Prefix:
- In the left bar, click Prefix.
- Click New Prefix List.
- Enter a name for the list.
- In the Add Prefix field, enter one or more data prefixes separated by commas.
- Click Add.
Site:
- In the left bar, click Site.
- Click New Site List.
- Enter a name for the list.
- In the Add Site field, enter one or more site IDs separated by commas.
- Click Add.
VPN:
- In the left bar, click VPN.
- Click New VPN List.
- Enter a name for the list.
- In the Add VPN field, enter one or more VPN IDs separated by commas.
- Click Add.
Then click Next to configure topology in the wizard.
Step 3: Configure the network topology
In the Topology tab, create a network topology. The customer I was working with had a mesh topology. We did the following:
- In the Add Topology drop-down, select Mesh.
- Enter a name for the mesh region policy component.
- Enter a description for the mesh region policy component.
- In the VPN List field, select the VPN list for the policy.
- Click New Mesh Region.
- In the Mesh Region Name field, enter a name for the individual mesh region.
- In the Site List field, select one or more sites to include in the mesh region.
- Repeat Steps 5 through 7 to add more mesh regions to the policy.
- Click Save Mesh Region.
You can also use an existing topology. Click Next to move to configure traffic rules in the wizard.
Step 4: Configure traffic rules
In the Application-Aware Routing bar, select the Cflowd tab. Click the Add Policy drop-down.
- Select Create New. The Add Cflowd Policy popup opens.
- Configure the following parameters for the cflowd template:
- In the Active Flow Timeout field, specify how long to collect a set of flows on which traffic is actively flowing. We recommend 60 seconds.
- In the Inactive Flow Timeout field, specify how long to wait to send a set of sampled flows to a collector for a flow on which no traffic is flowing. We recommend 15 seconds.
- In the Flow Refresh Interval field, specify how often to send the cflowd template record fields to the collector. We recommend 60 seconds.
- In the Sampling Interval field, specify how many packets to wait before creating a new flow, a value from 1 through 65,536 seconds. While you can configure any integer value, the software rounds the value down to the nearest power of 2.
- Click Add New Collector, and configure the location of the cflowd collector
- In the VPN ID field, enter the number of the VPN in which the collector is located.
- In the IP Address field, enter the IP address of the collector.
- In the Port Number field, enter the collector port number. The default port is 4739.
- In the Transport Protocol drop-down, select the transport type to use to reach the collector, either TCP or UDP.
- In the Source Interface field, enter the name of the interface to use to send flows to the collector.
Click Save cflowd Policy.

Step 5: Apply policies to sites and VPNs
Enter a policy name and description. From the Topology bar, select the type of policy block. The table then lists policies that you have created for that type of policy block. Click Add New Site List. Select one or more site lists, Click Add, and then Save Policy.
Step 6: Activate a cflowd policy
Activating a cflowd policy sends that policy to all connected vSmart controllers. In vManage NMS, select the Configure > Policies screen. Select a policy and click the More Actions icon to the right of the row, and then click Activate.
Want more visibility into your SD-WAN deployment?
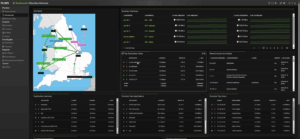
You got it. In Scrutinizer’s latest release, v18.16, we added Viptela SD-WAN reports. After configuring Viptela integration with Scrutinizer, you will get access to the brand-new reports such as Carrier and Tunnel Utilization, Tunnel Performance, vEdge Health, and Status All Components.

Are you looking to get visibility into your SD-WAN infrastructure? Download Scrutinizer and get the most out of Viptela IPFIX exports and integrations.