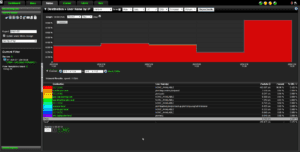
I have had a few customers ask about username reporting with Netflow within their incident response system. Collecting user activity and viewing reports filtered on specific users can give administrators insight and convenience when looking at user logged into the network when investigating an incident or providing detailed reports for management. Most authentication systems are supported (E.g. Cisco ISE, Enterasys Mobile IAM). Adam has discussed the advantages to administrators in a previous blog about username reporting with Netflow. In this blog I will go over how to integrate with a Microsoft Domain Controller, and then use an incident response system to utilize username reporting.
Overview
- Modifying the Configuration File
- Applying Domain Login Credentials
- Downloading Psexec
- Verify everything was configured properly
- Installing System Metrics as a Service
- Viewing the Data
I have gone through the process and will provide the instructions for setting it up. Before beginning here are a few things to prepare:
- You will need to have an account with access to query WMI on Active Directory Server
- Download a third party tool, psexec.
Modifying the Configuration File
- Open the <SCRUT_HOME>\files\conf\ipfixify-sysmetrics.cfg file in a text editor.
- The first section specifies the IP Addresses and ports of one or more IPFIX Collectors.
Find and modify the following line:
collector=10.100.0.4:4739
Change it to:
collector=<IP_OF_SCRUTINIZER>:4739
- Scroll to the end of the ipfixify-sysmetrics.cfg file and on a new line, type in the IP address or addresses of the Active Directory Server(s) with the following format (Only one line is needed):
member=10.1.1.1
member=10.1.2.1
- Save the changes to this file and exit the text editor.
Applying Domain Login Credentials
You will need domain user that is capable of remotely querying WMI to complete this step. These credentials are stored encrypted in the ipfixify-sysmetrics.cfg file and are managed using the ipfixify.exe executable.
- Open an elevated Administrator Command Prompt
- Navigate to the <SCRUT_HOME>\bin directory
- Execute the following command:
ipfixify.exe --credentials="<SCRUT_HOME>\files\conf\ipfixify-sysmetrics.cfg"
Follow the instructions provided on screen to complete this step and enter credentials.
Downloading Psexec
A 3rd party tool is required to collect all the necessary data from any member specified in the ipfixify-sysmetrics.cfg file. If you have already downloaded Psexec you only need to move to the Scrutinizer bin directory.
- Download Psexec from Microsoft Sysinternals
- Copy psexec.exe to the <SCRUT_HOME>\bin directory
Verify everything was configured properly
- open an administrator command prompt and navigate to the <SCRUT_HOME>\bin directory.
- execute the following command
ipfixify.exe --config "<SCRUT_HOME>\files\conf\ipfixify-sysmetrics.cfg"
--sysmetrics --psexec="<SCRUT_HOME>\bin\psexec.exe" --verbose
If everything is configured properly, feedback will scroll by to indicate data is being collected and exported to the specified IPFIX Collector(s).
If there are issues with the configuration, Scrutinizer will identify the error in the ipfixify-sysmetrics.cfg file.
Installing System Metrics as a Service
Installing System Metrics as a service will continue to be collected whenever the system is rebooted.
- Locate and Copy files\conf\ipfixify-template.cfg to files\conf\ipfixify-sysmetrics.cfg
- Open an administrator command prompt and navigate to the <SCRUT_HOME>\bin directory.
- Execute the following command:
ipfixify.exe --install auto --name "SystemMetrics" --config
"<SCRUT_HOME>files\conf\ipfixify-sysmetrics.cfg" --sysmetrics
--psexec="<SCRUT_HOME>\bin\psexec.exe"
- Open the Windows Services Manager from the control panel, or executing services.msc from the command prompt.
- Locate and double click the IPFIXify:SystemMetrics service.
- Click the Log On tab and click the This account radio button.
- Type in the username and password used in the Applying Domain Login Credentials section.
- Restart the IPFIXify: SystemMetric Service
IPFIX as a service
Viewing the Data
After several minutes, the User Name by IP will be available from the Source and Destination Reports menus within your Incident Response System.

Reach out to our team if you need help setting this up or if you have any technical questions.


