I’ve recently had a couple of people reach out to me about the deployment process of our Scrutinizer Virtual Appliance (VA). I wanted to create a quick reference guide for those who are new to Scrutinizer. This guide will review both what is required for the deployment as well as the steps you’ll need to take to successfully complete the deployment.
(If you are deploying on Hyper–V or would like further detail on the deployment process, take a look into our Scrutinizer Manual).
Before we begin, you’ll need to obtain the OVF and license from your Plixer contact, or receive the evaluation here (the evaluation will deploy with an eval license) as we’ll need to apply the license to the webUI after deployment.
It’s good to ensure that you have an IP address ready to assign to Scrutinizer during the deployment. (We recommend that you give the Scrutinizer virtual machine NIC a static MAC address as this will prevent the machine ID from changing and prevent licensing issues down the road).
The Scrutinizer Virtual Appliance requires a minimum of 100GB of disk space, 16GB of RAM, and 1 CPU with 4 cores.
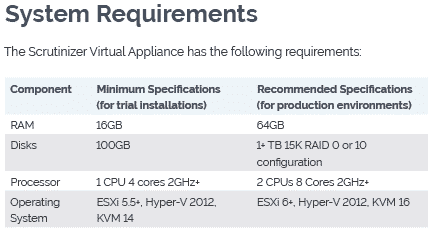 The performance you’ll get out of the Scrutinizer VA depends on the hardware on which it’s deployed and the resources allocated to the VA.
It’s recommended to dedicate, not share, all the resources that are allocated to the Scrutinizer virtual machine. This is especially important for the Scrutinizer datastores. In environments with high volumes of NetFlow data, Scrutinizer will require dedicated datastores. Scrutinizer hardware appliances are recommended for deployments with an exceedingly high flow volume, as they are designed to handle the highest flow rates.
Now that we know what we need, lets jump into the fun stuff and get Scrutinizer deployed!
Scrutinizer OVF Deployment on ESXi:
1. Download the latest Scrutinizer Virtual Appliance. You can do this by following the eval link we discussed earlier or by reaching out to one our representatives for the OVF.
2. Using VMware vSphere, or vCenter, connect to the ESX host where you’ll want deploy the Scrutinizer Virtual Appliance.

3. From here go to File (in the upper left-hand corner) > Deploy OVF Template.
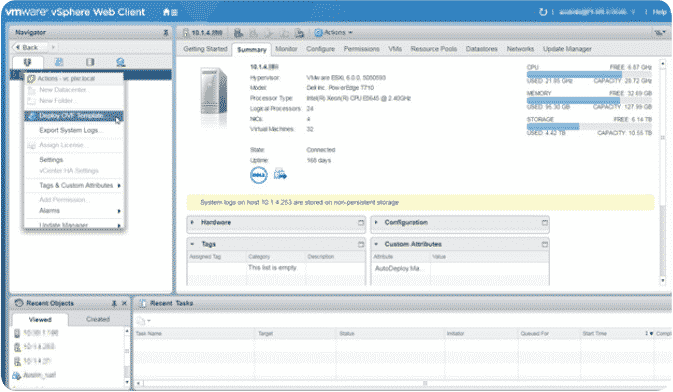
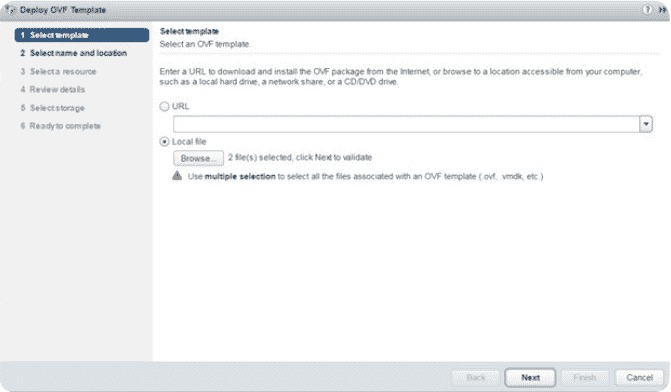
4. Select “Local file” and browse to the downloaded Scrutinizer OVF file and the Scrutinizer VMDK file, then click “Next.”
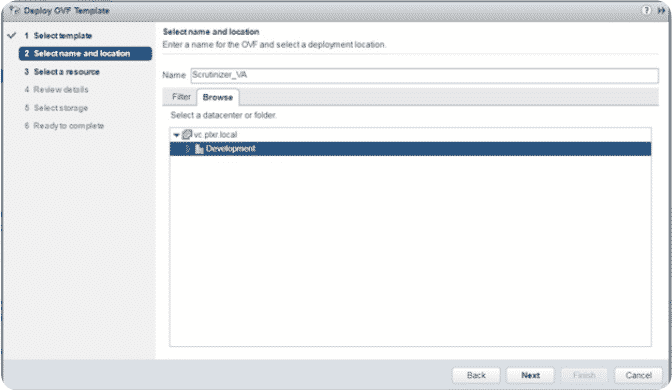
5. Give your Scrutinizer VA a name and press “Next.”
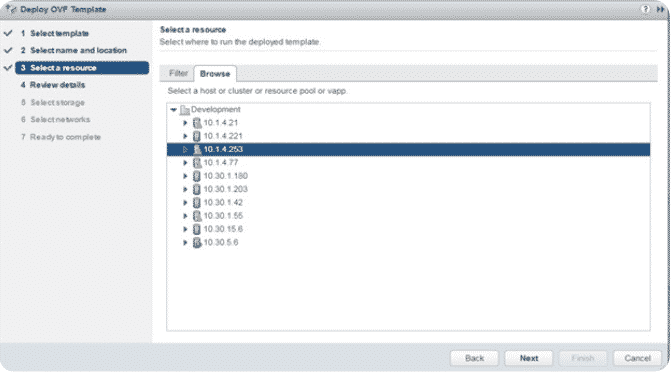
6. Select an ESX to deploy the machine on if your host is not already selected and press “Next.”
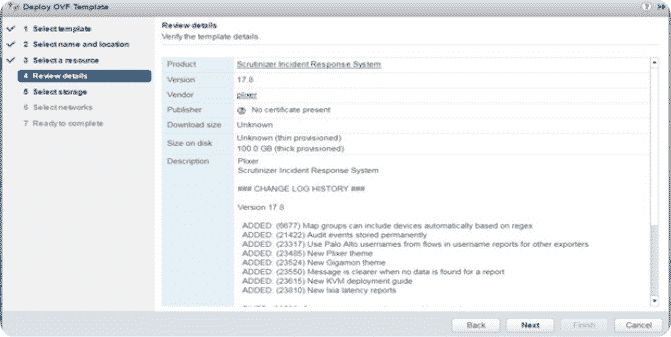
7. Review the details of the virtual machine and press “Next.”
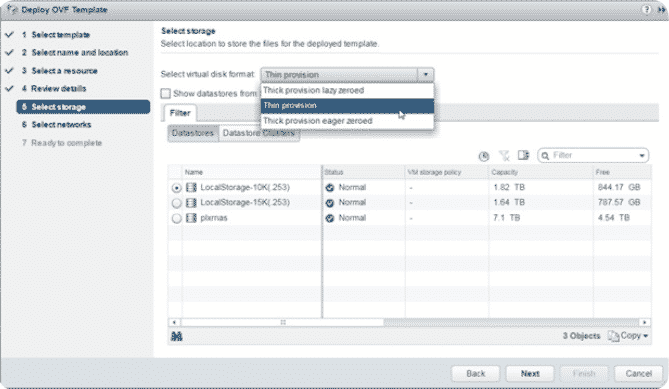
8. Select your datastore, set your disk format to “Thin Provision” and press “Next.”
NOTE: Be sure to read the “Optimizing Scrutinizer Datastores” section to obtain the best performance and collection rates.
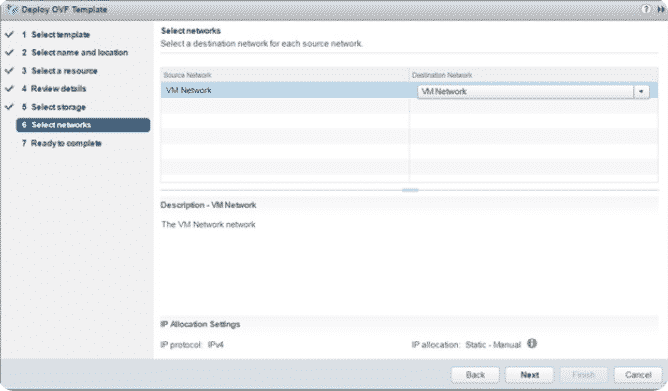
9. Select the network to be used by the Scrutinizer Virtual Appliance.
10. A summary of the options you chose will appear. Click “Finish” and it will import the Scrutinizer Virtual Appliance. This can take a few moments, so feel free to grab a coffee and come back.
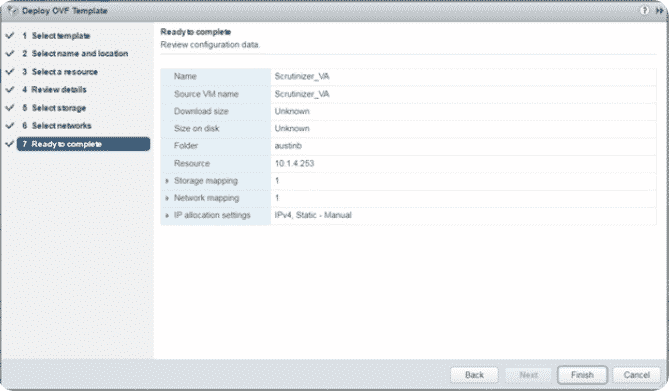
11. Before powering on the Scrutinizer virtual machine, it’s important to set a static MAC address for licensing purposes. Right-click on the Scrutinizer VM and select “Edit Settings…”
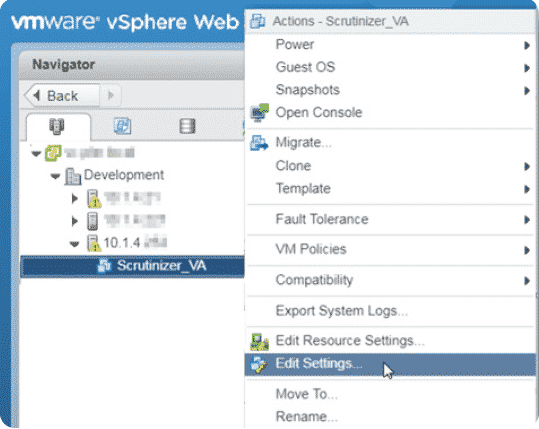
12. Select the Network adapter, set the MAC Address to Manual, enter in a unique MAC Address, and then proceed to the next step.
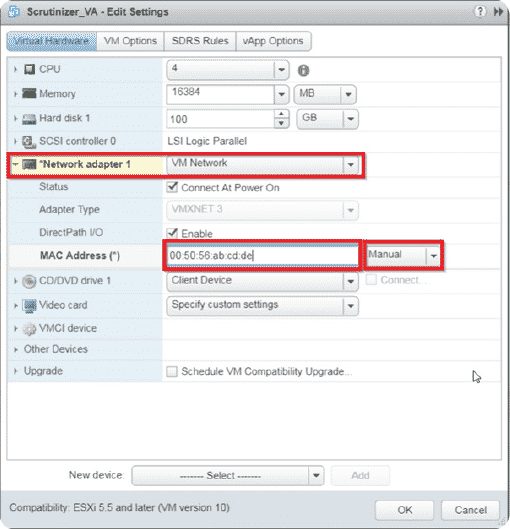
13. The next step is to allocate and dedicate resources to the Scrutinizer virtual machine. For evaluation purposes, the Scrutinizer OVF grabs 1CPU with 4 cores, 16GB of RAM, and 100GB of disk space.
When deploying the Scrutinizer Virtual Appliance it’s recommended to increase the resources to meet the recommend system requirements listed earlier in this document. Since all installs will vary more resources may be required.
Start on the “Virtual Hardware” tab and increase the Memory, CPUs, and Hard disk as necessary (see system requirements section for more detail).
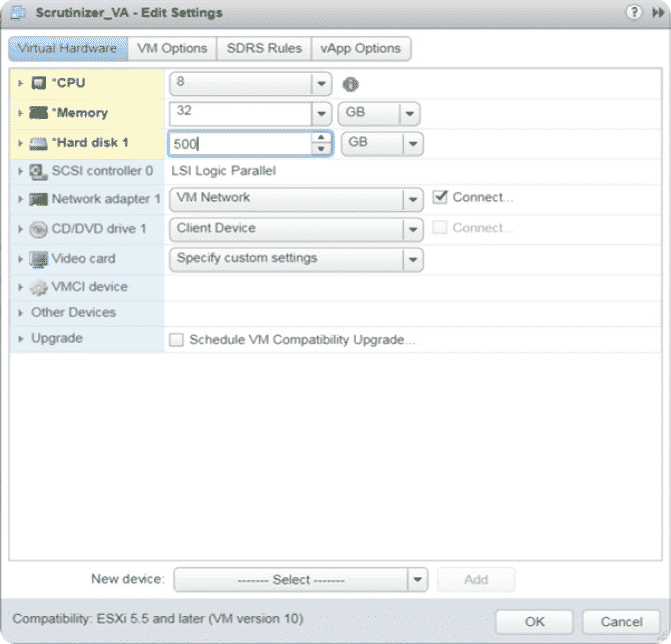
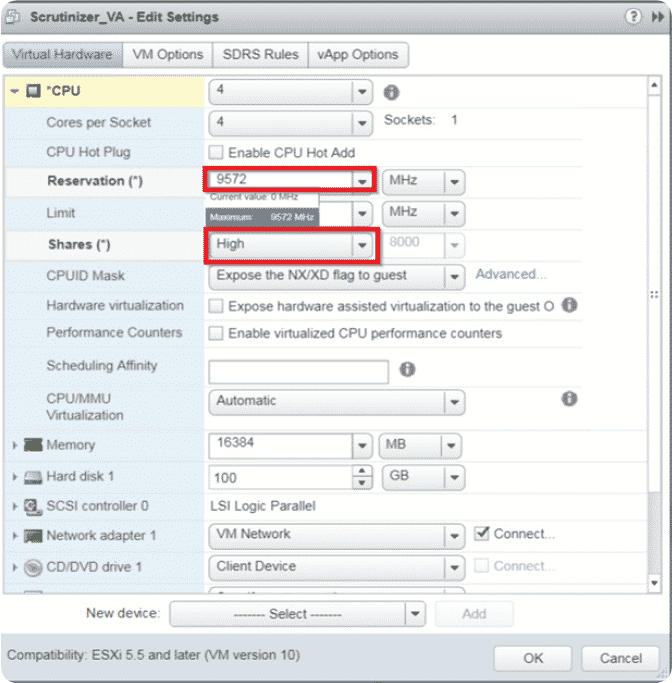
14. Next, navigate to the “Resources” tab. Under CPU and Memory, set the “Shares” value to High and set the “Reservation” maximum value to the amount of resources dedicated to the virtual machine. Now press “OK.”
NOTE: The amount of RAM in the screenshot below is on a small test ESX server, so it won’t match production install.
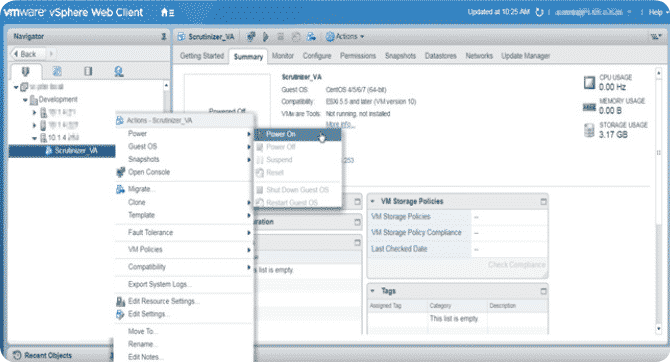
15. Right-click on the Scrutinizer virtual machine and power it on.
16. Click the console preview window and select “Open Remote Console”. A new windows will open and you can then log in to the Scrutinizer Virtual Appliance using root/scrutinizer.
NOTE: The server will perform a quick setup and immediately reboot.

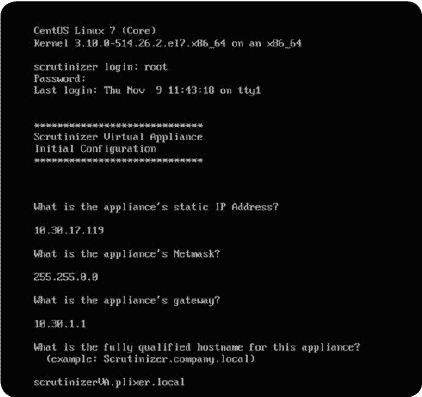
17. Log in to the server again and answer the provided questions. Press “Enter” and the server will reboot to apply the necessary settings.
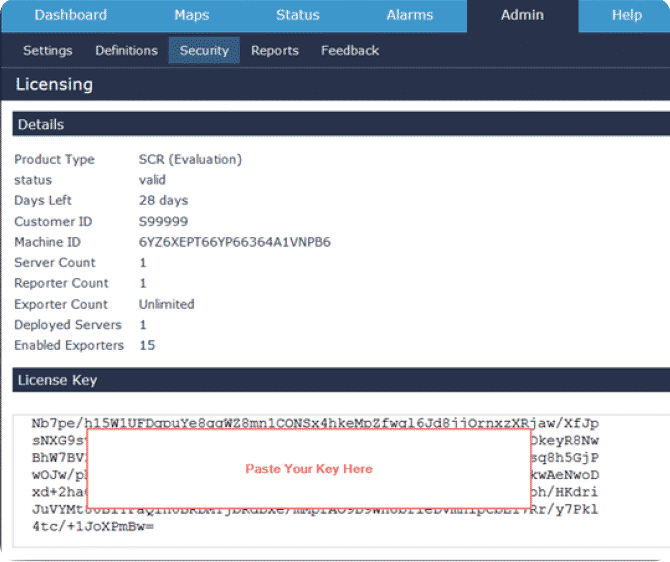
18. Now log in to the Scrutinizer web interface in your web browser and apply the necessary license keys.
Installing WMware Tools for ESXi:
Don’t worry, we’re just about done!
After you have powered on and gone through the initial Scrutinizer configuration, you can (optionally) install VMware Tools on the appliance. You’ll want these tools to graceful shutdown Scrutinizer and protect against corruption.
VMware Tools doesn’t come installed by default because each version of ESX installs a different VMware Tools package. Instead, there’s a command you can run from the interactive prompt:
1. Log in to the appliance as the “plixer” user using the password you set in the initial deployment.
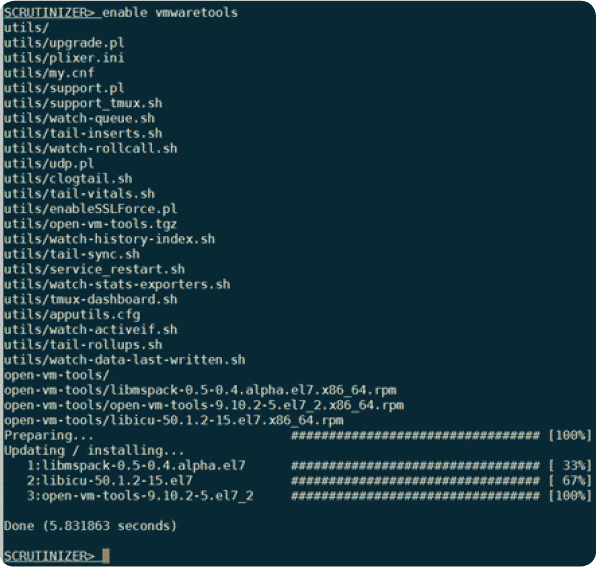
2. In the Scrutinizer interactive prompt, type the following commands:
‘scrut_util.exe’
‘enable vmwaretools’
![]()
3. The tool will then display the files in the terminal.
4. And you’re done! You will be able to see details of the appliance in vSphere under the summary tab.
Have any questions? Feel free to reach out to us for assistance and begin the process now.
Download the Scrutinizer Virtual Appliance to get started.


