
You asked, and we listened. By taking advantage of proprietary APIs or even just passing URLs with key variables, Scrutinizer can now be integrated with nearly any authentication or network monitoring platform. Today, I am going to talk about how to set up PRTG NetFlow integration.
A few words about PRTG
Founded in 1997, Paessler AG is based in Nuremberg, Germany. Its award-winning PRTG Network Monitor is an affordable, yet powerful and easy-to-use Unified Monitoring solution. Over 200,000 IT administrators in more than 170 countries rely on PRTG. PRTG NetFlow integration with Scrutinizer provides a strong end-to-end monitoring and investigation solution for the entire network infrastructure and the network traffic that flows across it.
“To really understand what’s going on in a network, one needs to analyze the traffic itself and also monitor the network the data is moved on. The first task is Plixer’s expertise while PRTG is focused on the infrastructure. By combining the two, network administrators gain valuable insight and it is hard for me to imagine how a professional network can be properly managed without both.” – Dirk Paessler, CEO, Paessler AG
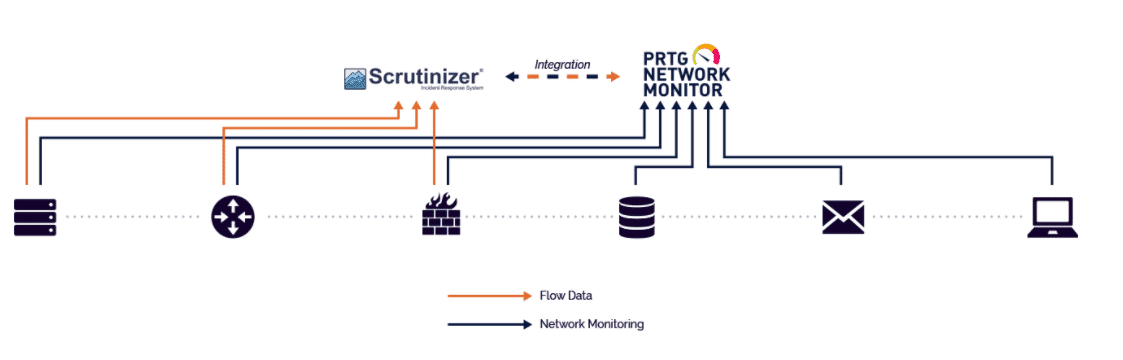
Among the benefits of the PRTG NetFlow integration, you have the ability to get unprecedented traffic insight all the way to Layer 7 applications, as well as pivot between the data available within PRTG and Scrutinizer when looking at specific devices. While PRTG is used to monitor your systems, devices, and applications, Scrutinizer analyzes the traffic patterns they generate.
Setting up PRTG NetFlow integration
This story starts when we were visiting a Midwestern customer. As we were about to start a training session, one of his colleagues—an avid PRTG user—joined us. He mentioned that they would like to be able to look beyond top talkers, run historical reports, and go back in time to investigate any network flow, conversation, or transaction. This is where Scrutinizer would come into play. A couple months later and voilà, PRTG NetFlow integration became available.
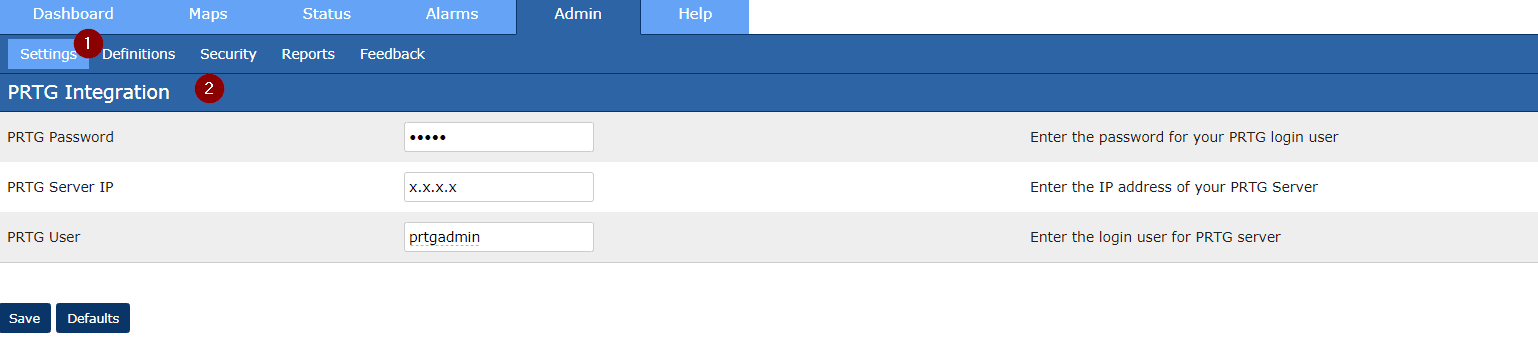
You can enable PRTG integration by navigating to Admin > Definitions > 3rd Party Integration. Simply select ‘PRTG’ in the dropdown menu and enter the IP address of your PRTG server in the URL box:

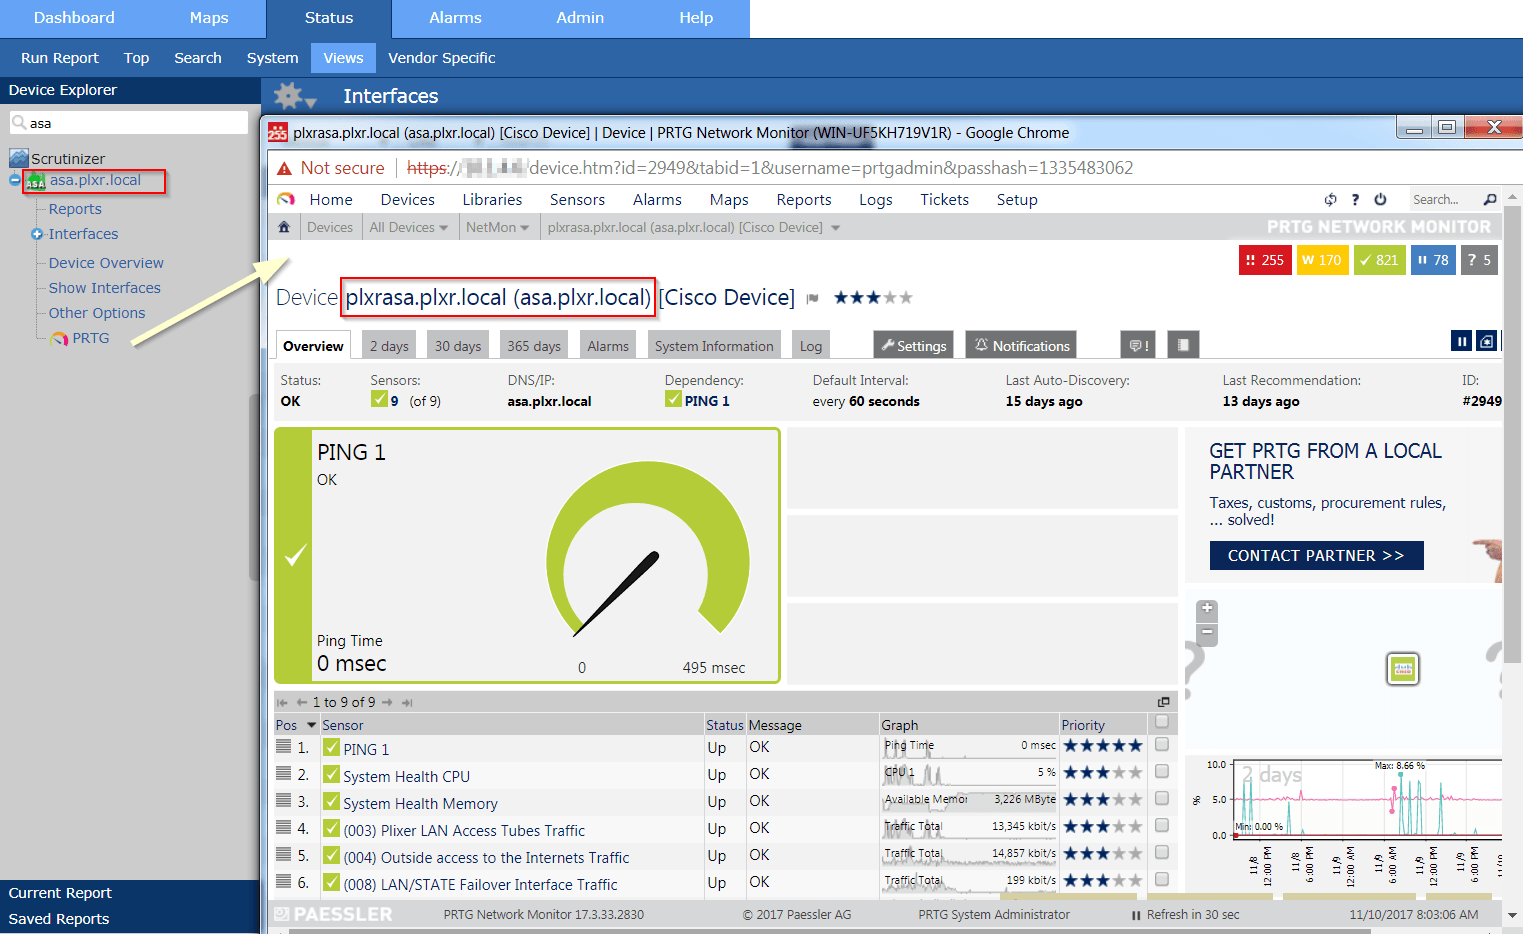
Now that we enabled the PRTG Third Party integration, its icon will be displayed in the Device Tree for each exporter. By clicking on the PRTG icon, a browser is launched as shown below. PRTG will then display the device statistics for the exporter we selected in Scrutinizer:Then navigate to Admin > Settings > PRTG and enter the IP address of your PRTG deployment as well as the username and password of your PRTG user. Save the changes and you are all set.
Now that we enabled the PRTG third-party integration, its icon will be displayed in the Device Tree for each exporter. By clicking on the PRTG icon, a browser is launched as shown below. PRTG will then display the device statistics for the exporter we selected in Scrutinizer:
Further PRTG NetFlow Integration
As a result of the PRTG NetFlow integration work we did, we can go from viewing the NetFlow exporter in Scrutinizer to the PRTG system. We now need to get from PRTG to the NetFlow data in Scrutinizer using a similar process. After doing a bit of research, we learned that this process would be a little more work. Currently, we are collaborating with the PRTG development team on creating the reverse integration. In the meantime, reach out to our team with any questions on how to set a PRTG NetFlow Integration up.