
In today’s digital world, nothing is safe. Just today I came across this post that talks about hackers attacking network printers. It’s not far-fetched to think that your printers are a major cyberattack vector, but how can this type of attack affect your network? More importantly, how can you monitor for it?
This all came from a study done at Ruhr-Universität Bochum in Germany where they analyzed 20 printers and multifunction printers (MFPs) from several vendors. They discovered that each of the units was affected by at least one vulnerability. This included flaws that can be exploited to crash the device or obtain sensitive information that provided access to the organization’s network
The study goes on to mention that the hacker could also access information like stored fax numbers, email contacts, and local users’ PINs along with SNMP community strings. Things got a little darker with the MFPs, since they could be integrated into a network using Email-to-Print or Scan-to-FTP. From this point, an attacker could obtain passwords for LDAP, POP3, SMTP, outbound HTTP proxy, FTP, SMB, and WebDAV. They could also grab IPSec pre-shared keys.
The researchers discovered that these attacks could be launched remotely over the network or the internet via a malicious website using cross-site printing (XSP) and cross-origin resource sharing.
So the next question is how do we monitor for this?
One vehicle for a printer attack is the combination of CORS spoofing and Cross-Site Printing (XPS), which allows the attackers to access a printer via a web-based attack using “a hidden IFrame to send HTTP POST requests to port 9100/tcp of a printer within the victim’s internal network.” Using a tool like Scrutinizer would allow you to monitor and alert on this type of network traffic.
Segment your resources.
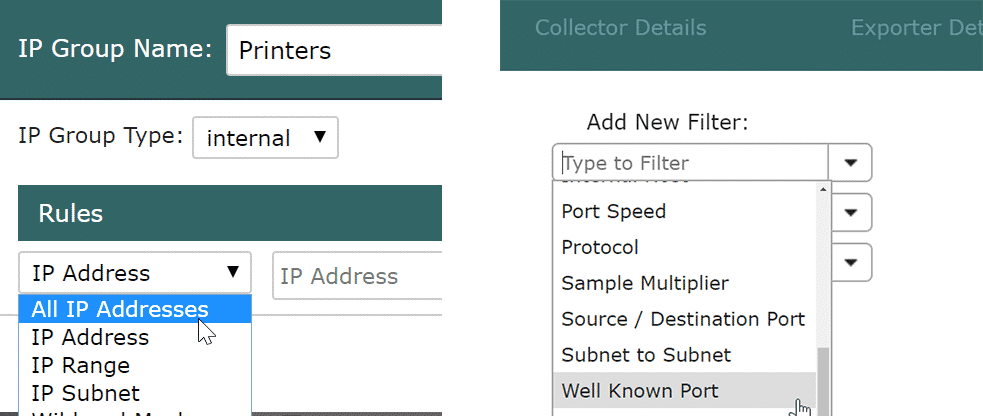
The first thing I would do is create an IP group called “Printers.” This gives us a filterable element to work with when building a report. To do this, click on the Admin Tab > Definitions > IP Groups. Here you can create the new group and add the various IPs. Notice that you have a lot of ways to define the IP range. Maybe you have your printers in a certain IP range or subnet?
Filter for that traffic.
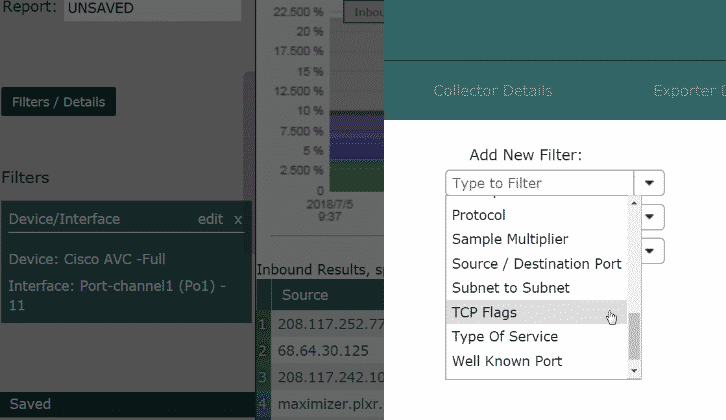
The next step is to filter for 9100 TCP traffic to the IP group. Go to the Status Tab and select the router or routers these printers are be on. Then click on the Filter/Details button and select “filters.” Add the printer group you just created, select “Well Known Port,” and then type in 9100. I would change the time-frame to every five minutes. This forces Scrutinizer to always report the last five minutes when displaying data.
Add a threshold.
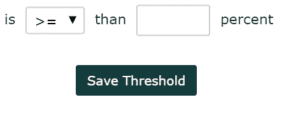 Now we need to add a monitor. Click on the filter/thresholds button and then click on “threshold.” At first I would set the threshold low so you can see what type of 9100 TCP traffic already exists on your network. As things progress, you can exclude IPs as a filter or as a group. Basically, you build a white list of allowed traffic. If you want to see another example of building this type of monitor, make sure to check out the blog that Plixer’s own Adam Howarth wrote on Monitoring POS with Network Traffic Intelligence.
And there is more . . .
I have only shown you one way to monitor this this type of traffic on your network. As you might have guessed, the ability to filter and monitor for any element being sent in the NetFlow/IPFIX traffic opens up a lot of possibilities. If you need to improve your security posture and gain deeper visibility, why not evaluate Scrutinizer?