Let’s face it: network maps are awesome. At a glance, they provide details we need about how our network is connected, and which devices other devices are connected to. The problem is that the majority of maps don’t provide the actual details that we want. Sure, being able to see what the network looks like is great, but if the links connecting one device to another don’t tell a story, I’m left with too many unknowns. We’ve highlighted our mapping feature in the past, but we’ve never explained how to create one. So, today, I want to explore how to create network maps, and the many benefits you can get from the dynamic maps in Scrutinizer.
Once upon a time, I worked for our tech support department. One of the features that seemed to be underused was Scrutinizer’s mapping functionality. Either customers didn’t understand how to create the maps, or they didn’t see how having yet another network map would be beneficial to their job (they couldn’t see how having bandwidth monitoring links was useful (likely a result of misunderstanding how to set up the links)).
Creating your Network Maps
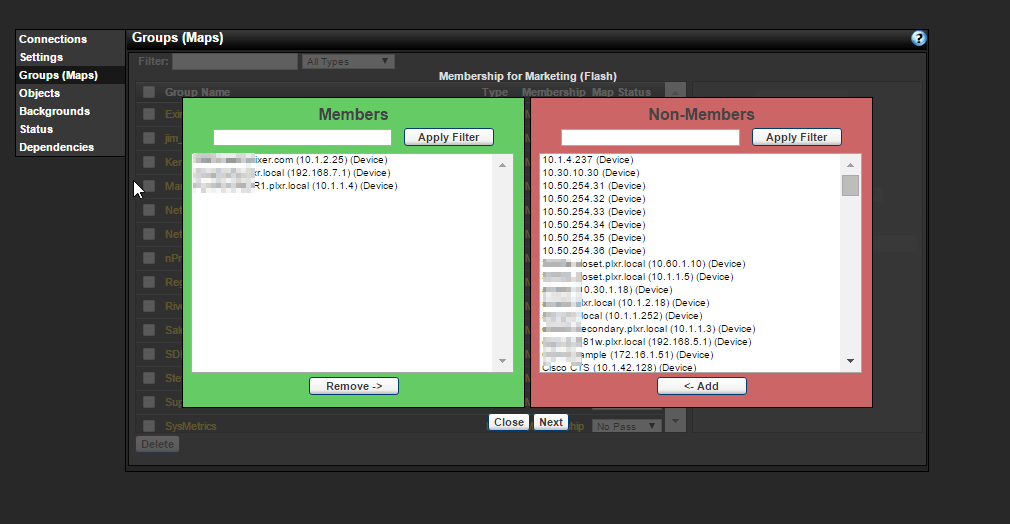
The first step to creating network maps is to navigate to the Maps tab. From there, select Create a Group (Map). A message will prompt you to give the group a name, and then select which type of map you want to create. In this article, I will select the Create Flash Group option. At this point, you are prompted to add the Members to the group. These are the devices (which are already sending flow data to Scrutinizer) that you are adding to the map.
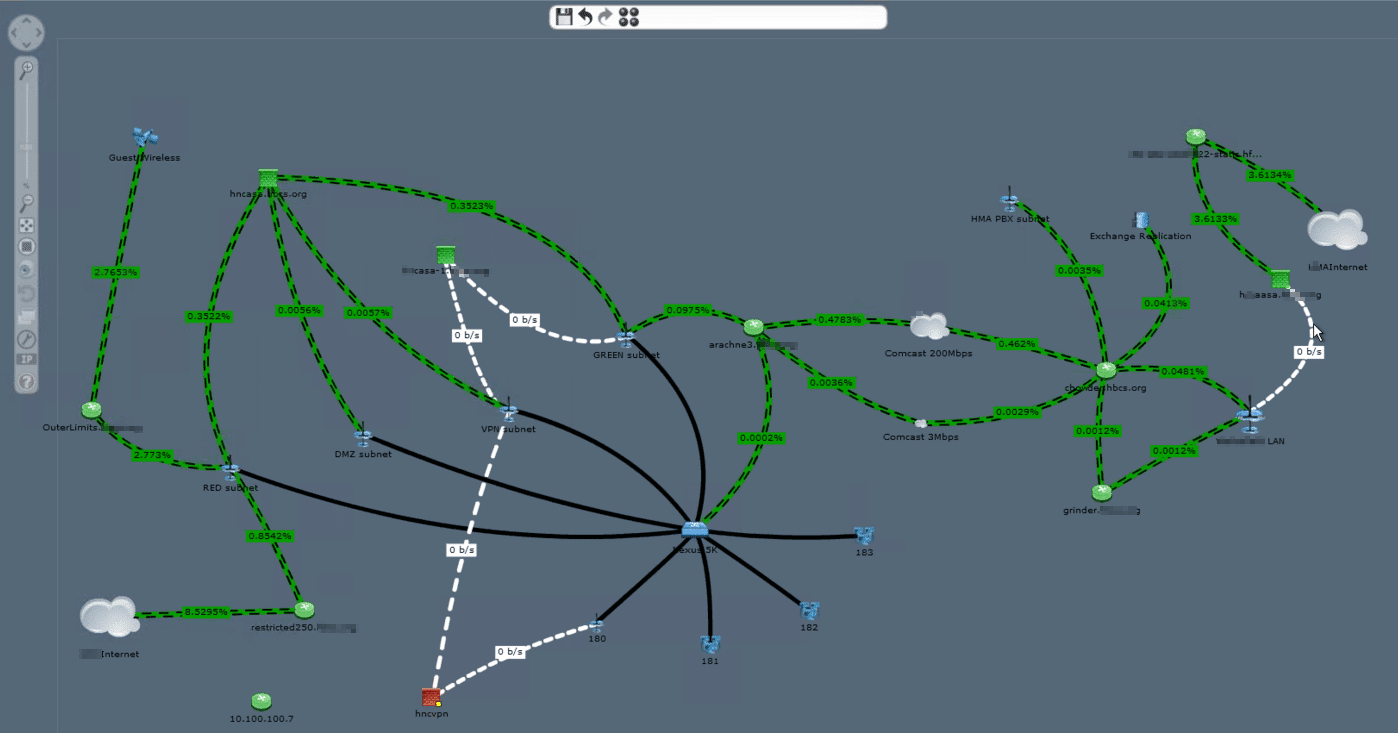
After you’ve selected the devices, you are prompted to assign the connections. This creates the visual links from one device and a specific interface, to another device. So, since you know that your Internet router connects to the firewall via the WAN interface, you would simply make this connection, and now you have a link created on your map. Now, of course, not all of your devices are flow-sending devices. So in order to add devices like computers, servers, printers, and air conditioners, you need to add objects. Doing this is simple—just right-click on the map and select Settings. From there, select Objects, then New Object. You’ll be adding all your air conditioners right alongside your Nexus 7000. When adding your objects, you can also enable polling and set up notifications when links reach defined thresholds.
So, now that you know how to create network maps, what kind of map did you create?
We’re interested in seeing how you have used this mapping functionality to improve your network visibility. Tweet us your awesome network maps @plixer. We’d love to see how you’ve made our mapping functionality even better. And, of course, if you have any questions about setting up your own awesome network maps, give us a call! We’d be happy to help.