Today, I’d like to walk you through the process to configure a mirror port in VMware’s VSphere. After you’ve deployed your new FlowPro Virtual Appliance, the steps to which you can find outlined here, you may wonder why you do not see traffic in your NetFlow collector. A very likely reason is that you may not have gone through the steps of configuring a mirror port in VMware where your FlowPro is deployed. Below are the steps required to configure a mirror port in VMware.
Configure a mirror port in VMware
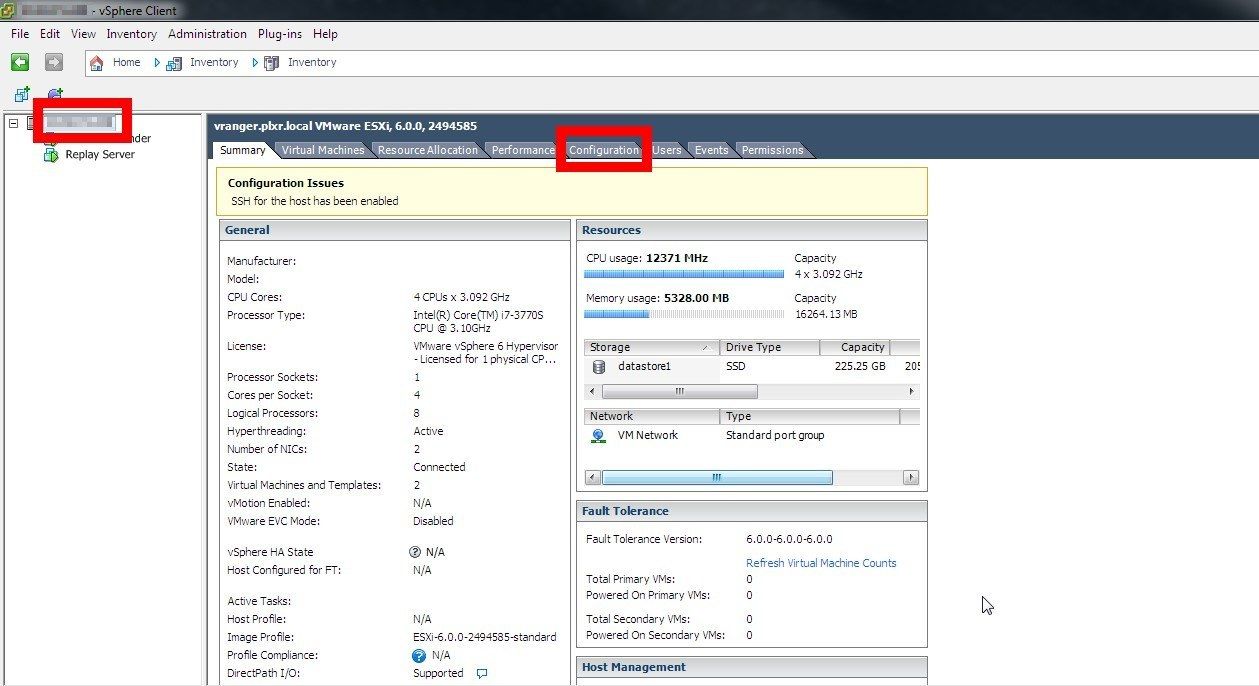
- The first step is to select the host on which you need to configure a mirror port. With the host selected, click on the “Configuration” tab.

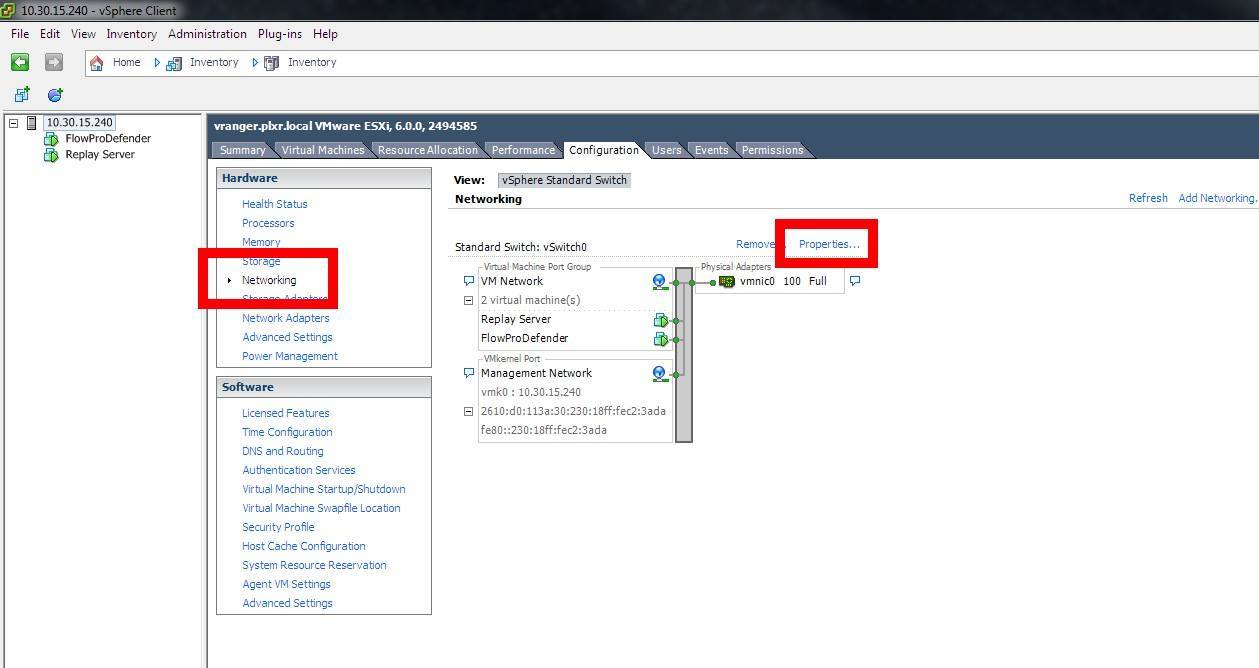
- From the “Configuration” tab, select “Networking” and open the “Properties…” menu.

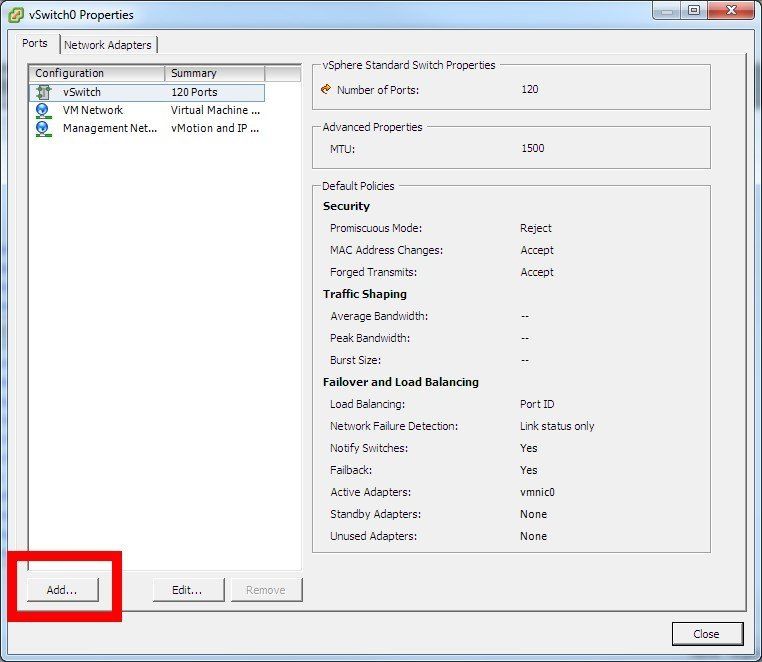
- Within the “Properties” window, select “Add.” to create a new virtual switch.

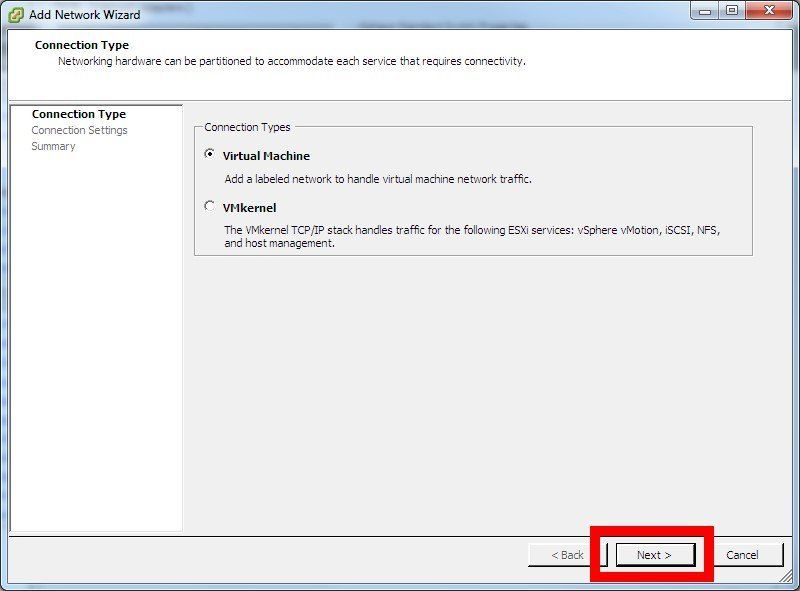
- After selecting the “Add.” button, a new window will open. Here is where you will select the connection type. Keep the connection type set to “Virtual Machine,” then select “Next.”

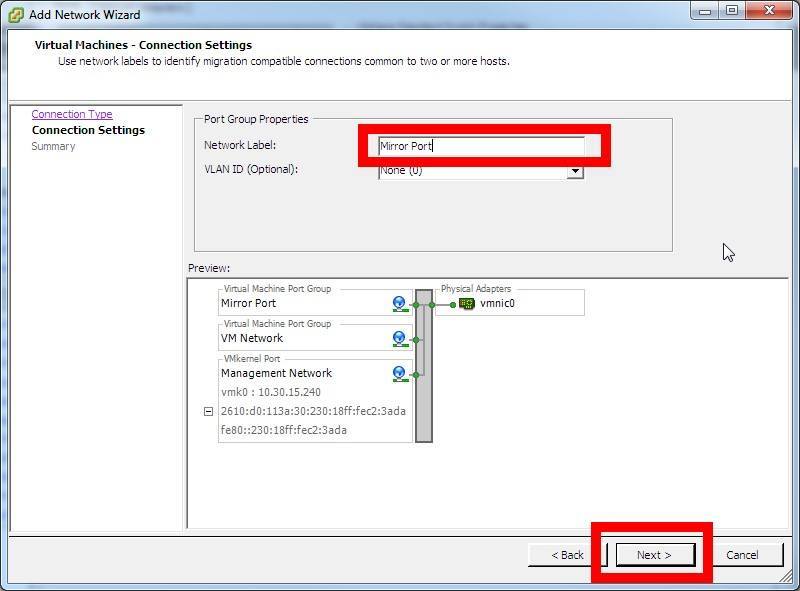
- You’ll now configure the name of the mirror port in the “Network Label” section. Change the name of the “Network Label” (as you can see below, I named it “Mirror Port”). Select “Next.”
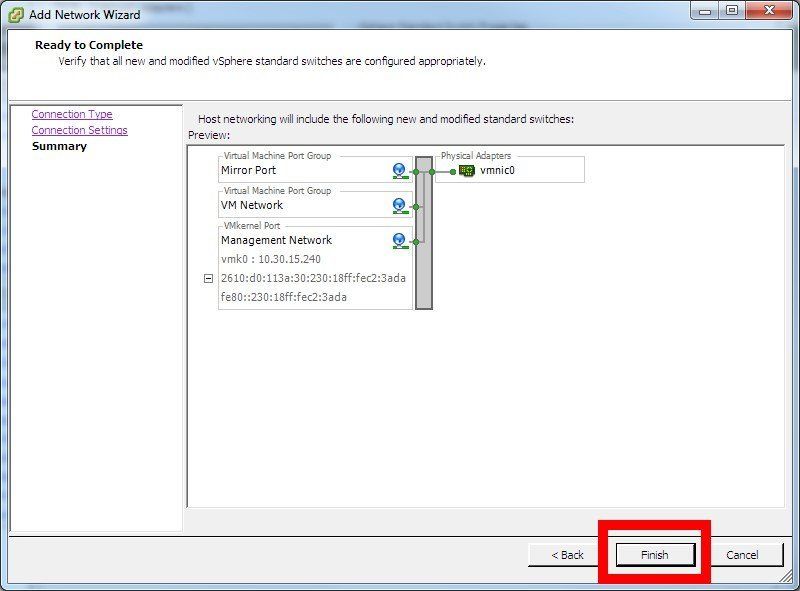
- Verify the information and if everything looks as it should, select “Finish.”
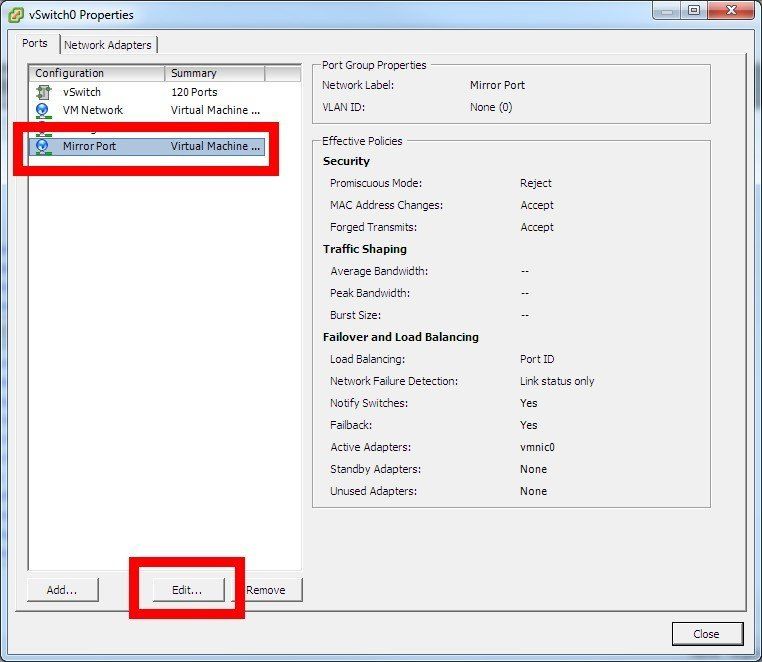
- You’ve now successfully added a mirror port in VMware, but we’re not finished yet. We now need to enable “Promiscuous Mode” on the new mirror port. With the new “Mirror Port” selected, click “Edit.”
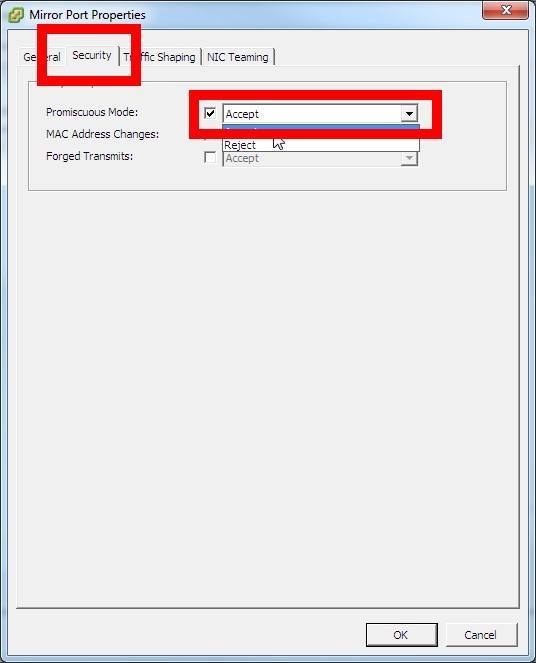
- Select the “Security” tab and click the checkbox next to “Promiscuous Mode.” In the drop-down menu, select “Accept” to allow this traffic.

Configuring our VM
Now we will set our Flowpro Defender’s monitor port to use our new “Mirror Port.”
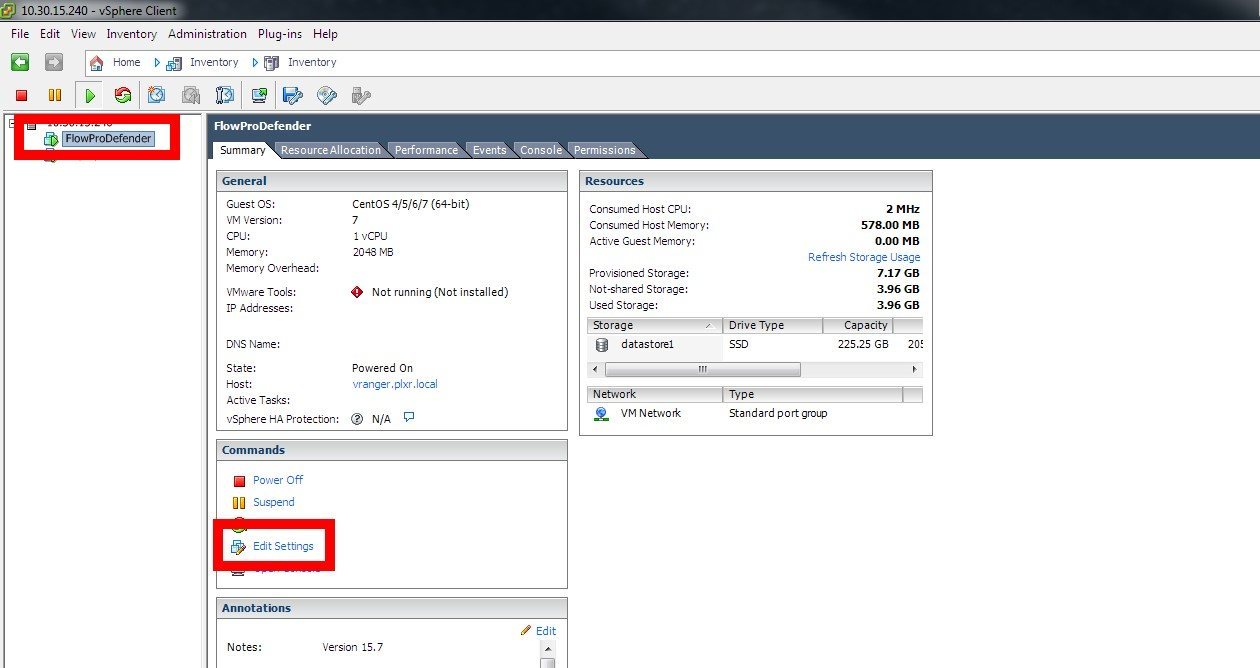
- With the Flowpro Defender VM selected, click on “Edit Settings.”

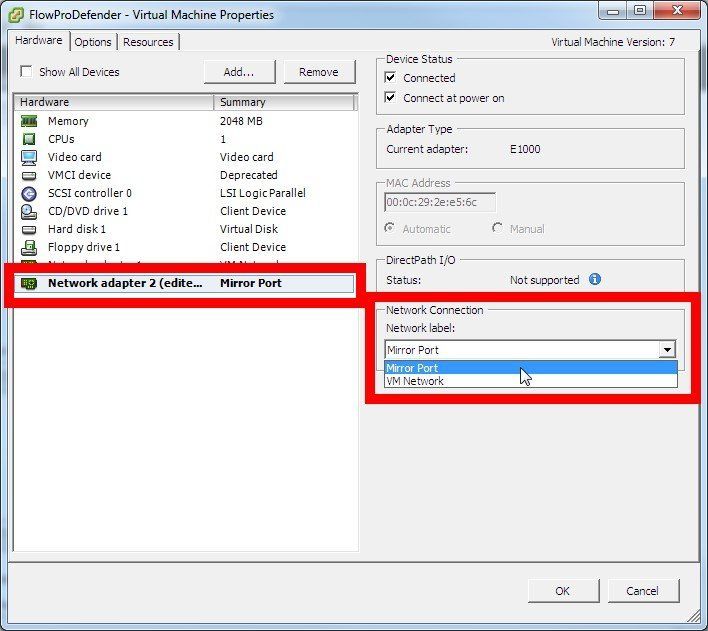
- With the Network adapter selected, change the “Network Connection” from “VM Network” to our new “Mirror Port.” If you are not sure which adapter is the monitor port of the VM, log into the console and run “ifconfig.” You can match the MAC address for “mon1” to that of the adapter in the Settings page of the VM.

That’s it. Now you have mirrored traffic flowing into the monitoring port of the FlowPro. You can test this in a few ways.
The last thing you’ll want to do is test everything. You can test this in a few ways.
- Log into the FlowPro via SSH or the console of VSphere with the “flowpro” user.
- From the command line, use the “snoop {ip address},” where {ip address} is the address of your NetFlow collector, to see all traffic flowing to or from the FlowPro VM.
If you have any questions or need help to configure a mirror port in VMware, give us a call. Our fantastic support team will help you along the way.