Today I want to talk about how to deploy a Flowpro Virtual Appliance. With the Flowpro Virtual Appliance, you can get that visibility into network traffic where exporting flow data is not natively available from devices. I want to go through the steps of deploying the Flowpro Virtual Appliance.
Before we begin deploying the Flowpro Virtual Appliance, you will need to download the required files. The Flowpro Virtual Appliance is packaged as an all-in-one virtual machine template known as an OVF template. You can download this from Here. For VMware deployments, ESX\ESXi 5.0 or higher is required. VMware Tools will be required to shut down the Flowpro Virtual Appliance through the VMware vSphere Client.
System Requirements
| Component | Minimal Specifications |
| RAM | 2GB |
| Disks | 5GB |
| Processor | 1 CPU 2 Core 2GHz+ |
| Operating System | ESXi5 or newer |
Deploying the OVF
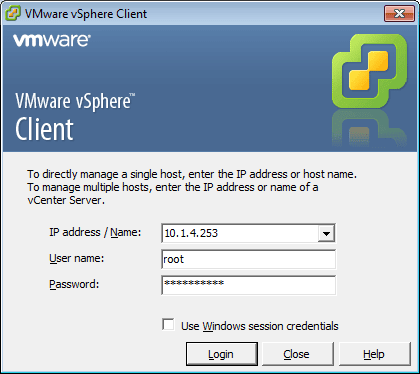
- Connect to the ESX/ESXi host using VMware vSphere, or vCenter.
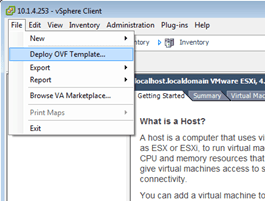
- In the top left corner, select File then Deploy OVF Template.
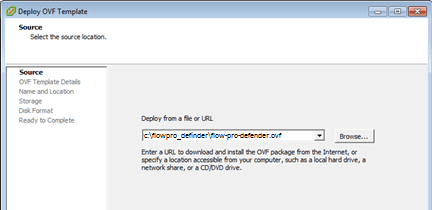
- Select Deploy from File, browse to the OVF Template, and click Next.
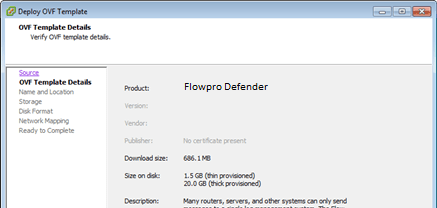
- Review the OVF template details and click Next.
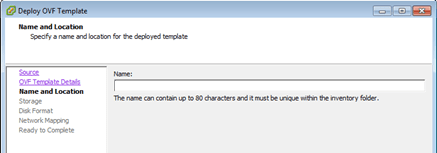
- Define the name of the FlowPro Virtual Appliance. You can set a different name in the OS after deployment and click Next.
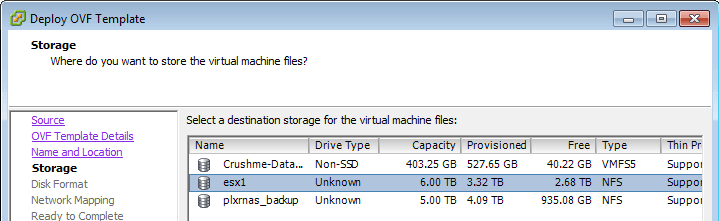
- Select a datastore that will be used for the virtual machine and click Next.
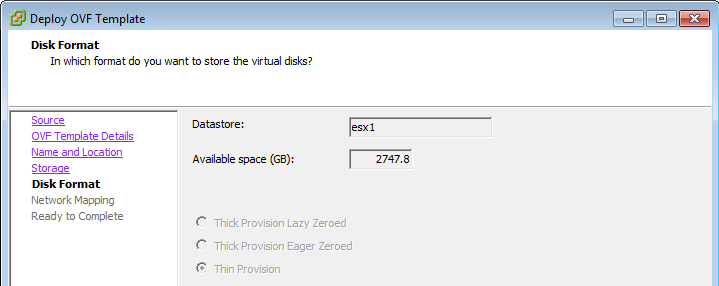
- Select the disk format and click Next.
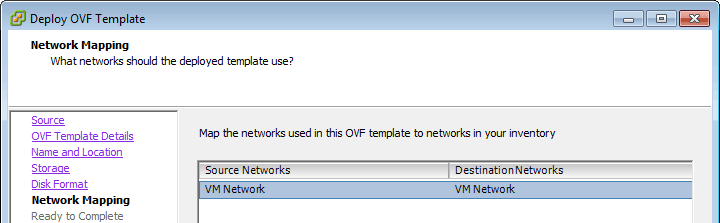
- Select the Network Mapping and click Next.
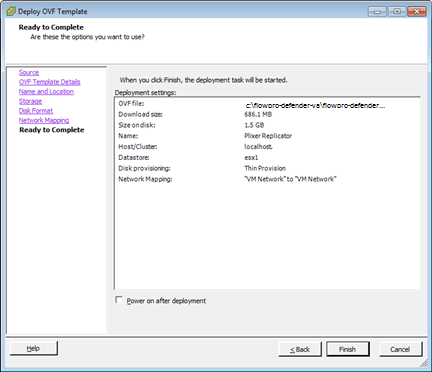
- Review the Virtual Settings and click Finish to import the OVF Template.
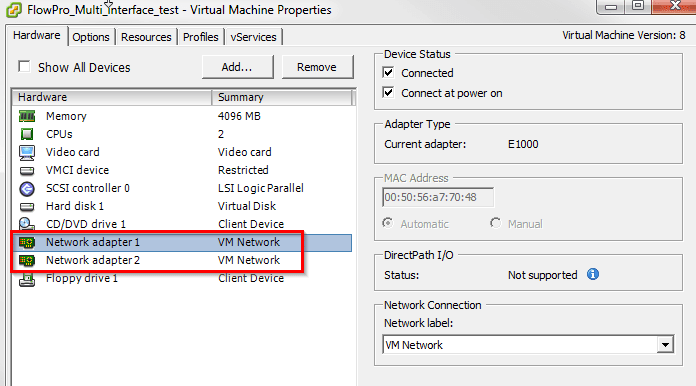
- The virtual machine itself has both network adapters and eth1 (or mon1) is already in promiscuous mode.
By default, it will start listening for traffic on the default virtual network, but it may not be the correct virtual network that needs to be monitored. If a user wants to monitor something different, they will have to setup a mirror port of a Virtual Distributed Switch or a mirror port using a physical NIC on the ESX/ESXi host.
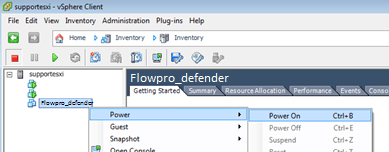
- Right click on the FlowPro virtual machine and power it on.
Flowpro Virtual Appliance Configuration
At this point, the Flowpro Virtual Appliance is deployed. The only thing left is to configure the appliance.
- Navigate to the Console tab and login using the username root and password flowpro. The virtual appliance will perform a quick setup and immediately reboot.
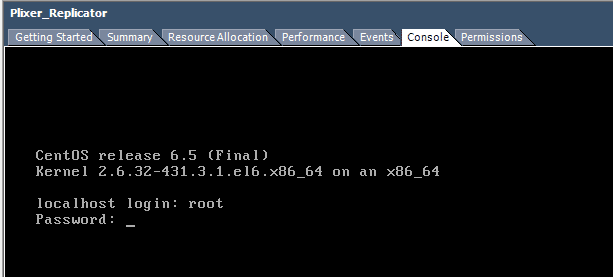
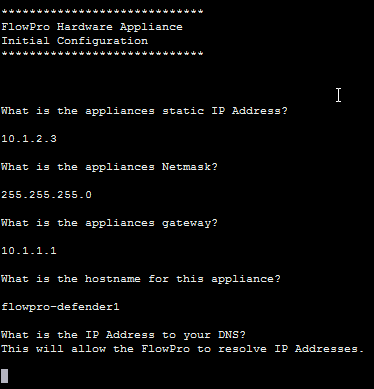
- Login to the virtual appliance again using the username root and password flowpro. Answer a few brief questions about networking. The virtual appliance will reboot to apply the necessary settings.
- Login to the virtual appliance command line with the flowpro username and password. Apply the license key by issuing the license set
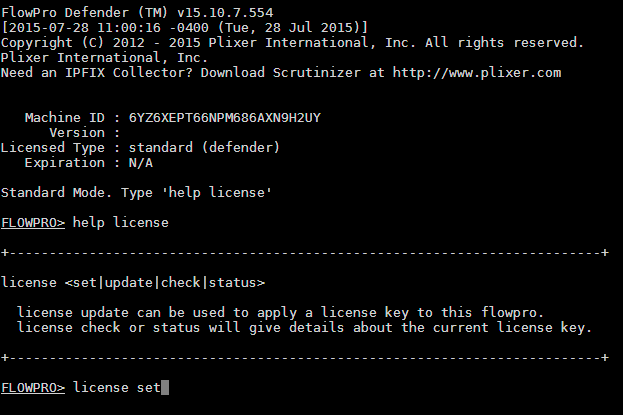
- In the new window, under “license=” paste in the license key and press CTRL+x to save.
The Flowpro Virtual Appliance is now ready for the final configurations.