
I was recently able to explore the Splunk software development kit with a customer. This helped me to implement another way to get username attribution within Plixer Scrutinizer. It’s a great addition to past methods such as Active Directory, Cisco ISE, and CounterACT because in many cases user information will already be logged in Splunk, which saves duplicate work with multiple systems.
Creating a query in Splunk
The first step of this process is to make sure that you have a query ready that returns username information within Splunk. A sample query may look something like this:
index=example username=* | lookup nameofmylookuptable user AS username OUTPUT ip
This query will be passed to Splunk using the Python SDK that will be running on Plixer Scrutinizer. I suggest doing some tests with the Splunk UI to modify both the query and the time range in order to get a good sample to work with.
With the customer I worked with, we ultimately decided to run the query every 24 hours and use the results to populate the database.
Using the Splunk SDK
Once you have your query ready to go, we can use the SDK to issue it from Plixer Scrutinizer and get the results into our database. I have supplied a sample script, but it will need some modification in order to work for your environment.
It may make sense to create a new Splunk user that has restricted privileges. The user should have both ‘rest_apps_view’ and ‘rest_properties_get’ set for privileges.
After creating the user, you can begin to populate all the necessary information within the Python script.
The sample I have provided uses some simple variable names that you can adjust for testing. As you can see, the Python script will store the passwords in plain text, but if this is a concern, you could modify this to use command line arguments or other methods provided by Splunk Enterprise.
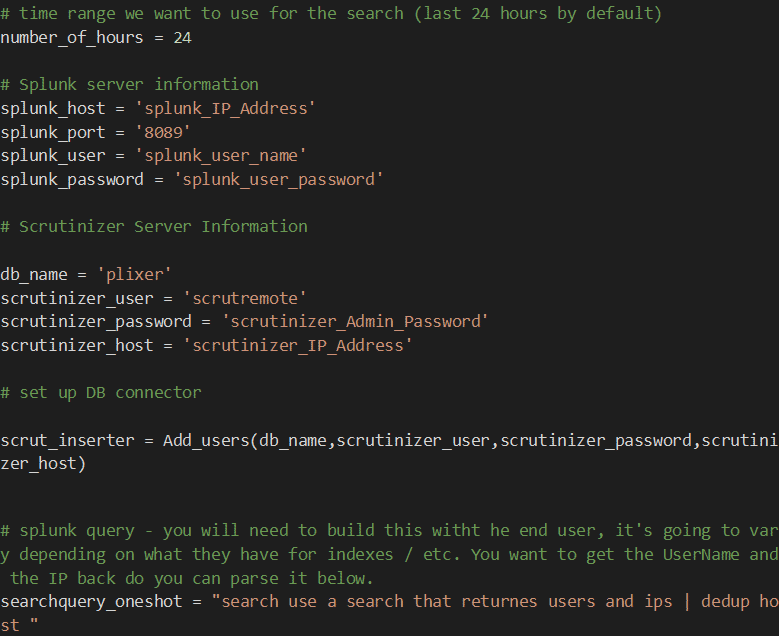
The ‘searchquery_oneshot’ variable is where you will be placing the query you prepared in the above step.
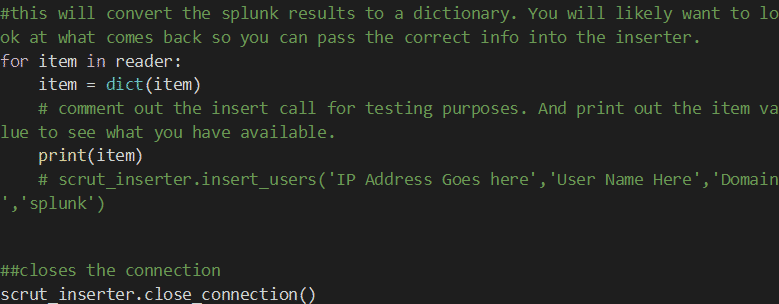
Once you have all the parameters filled out, you are ready to begin some testing. As I said, a lot of the output can vary depending on how you formatted your query. I recommend printing out the Splunk results to see what you have available, then inserting just the needed parameters into the scrut_inserter method.
Verifying the results
The scrut_inserter method requires two elements from the Splunk results: IP address and username. You will also need to put in your domain name, which will be prepended to all the usernames.
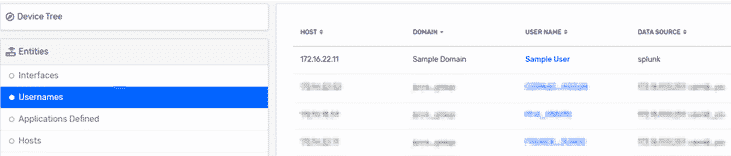
Once the script is run from the command line, you can make sure it’s working by looking at the Usernames entity view. You should see the Splunk data source showing up with the appropriate information.
Contact the author
If you are not super familiar with Python or the Splunk SDK, please feel free to reach out to me directly for help in getting this set up. I’m happy to help with the initial configuration as well as preparing reports within Plixer Scrutinizer that will leverage the new username fields.