
Being on the pre-sales side of the house, I hear about a lot of upcoming projects for a variety of different companies and verticals. One that is really starting to get some traction is a cloud-first initiative. This guide aims to help new users deploy their Scrutinizer server into Amazon AWS as an AMI.
Initial Steps
There are a couple of things we need to take care of before deploying the Scrutinizer AMI. First, you will need to contact a Plixer Engineer to give you access to the AMI. We’ll need:
- Amazon Account Number
- Region you will be deploying in (i.e. us-east-1)
- Expected Flow Volume (if known)
Once we have this information, we will share our AMI with you and you will be able to deploy it in your VPC.
Deploying the AMI into AWS
Next we will go over deploying the AMI in your VPC. If you run into any issues or errors feel free to reach out to the Plixer team for help.
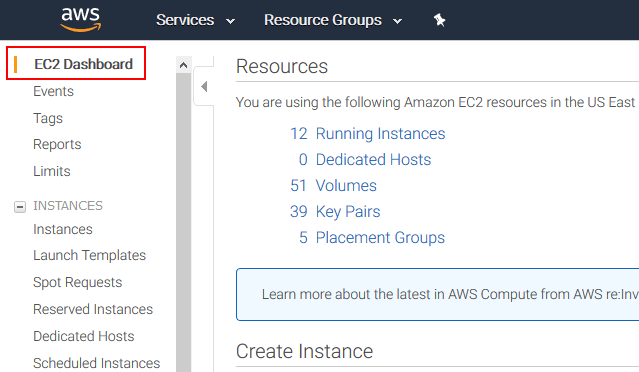
1. Open the Amazon AWS From the console navigation bar, select the region that you instructed Plixer’s support to place the AMI in. Navigate to the EC2 Dashboard.
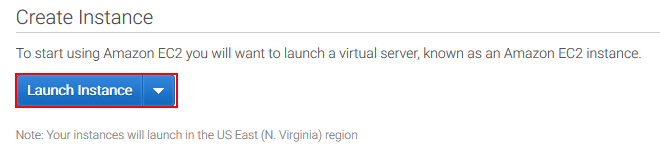
2. Click the Launch Instance button.
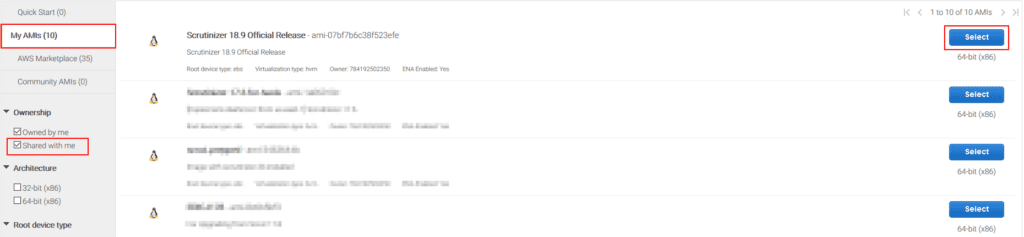
3. In the navigation pane, choose Images > AMIs to display the list of AMIs available to you in the region. Make sure to check the Shared with me checkbox. Select the Scrutinizer AMI from the list.
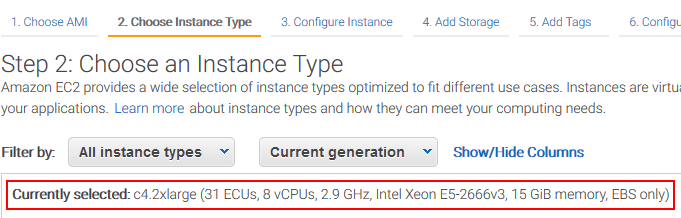
4. The recommended specifications for the production environments are the same as for the Scrutinizer Virtual Appliances. We recommend c4.2xlarge for an Instance Type if the expected flow rate is under 10,000 flows per second.
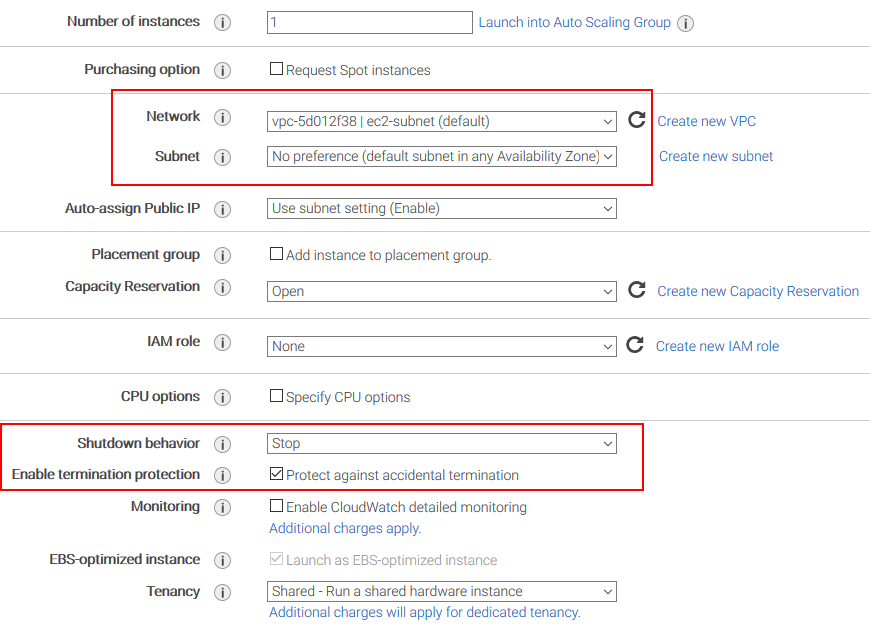
5. Navigate to the Configure Instance Details section. Set the Shutdown Behavior to Stop and enable Termination Protection. Select the network and subnet you would like to assign to the instance from the dropdown menus. Then assign the IP addresses to the AMI. It is highly recommended to deploy AMIs with two NICs and use the secondary NIC as the collection point. As of now, you cannot release the primary private IP address of an instance unless you terminate the instance itself.
6. In the Add Storage section, adjust the Volume Size as needed for the requirements of your project. The Root Volume Size can be increased up to 1024 GB. Please see the ‘Adding Storage to AMI’ section or contact Plixer Support if you need to expand Storage. Make sure the Delete on Termination box is checked

7. [Optional] We recommend using Tags to categorize your AWS resources—e.g., by purpose, owner, or environment. Each tag consists of a key and an optional value, both of which you define. We recommend that you devise a set of tag keys that meets your needs for each resource type. Using a consistent set of tag keys makes it easier for you to manage your resources. You can search and filter the resources based on the tags you add

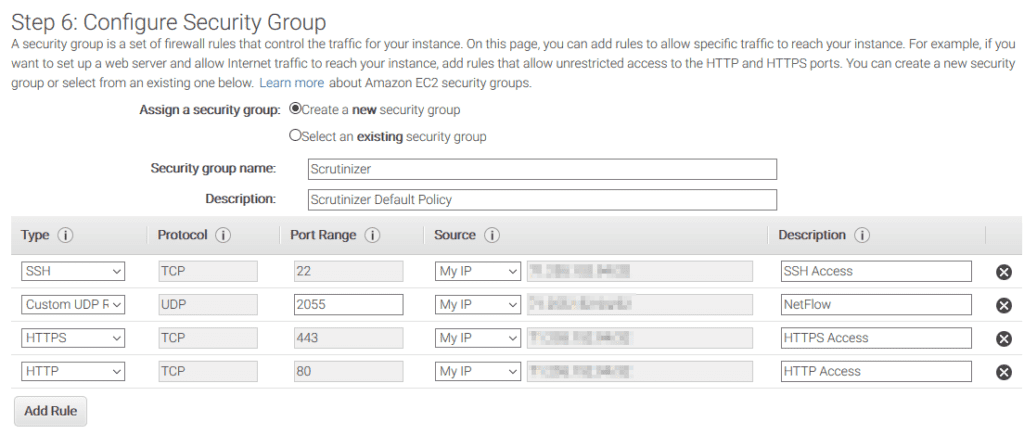
8. Next, create a new Security Group or assign the instance to an existing group. A security group is a set of firewall rules that control the traffic for your instance. You can add rules to allow specific traffic to reach your instance. For instance, if you want to set up a web server and allow internet traffic to reach your instance, add rules that allow unrestricted access to the HTTP and HTTPS ports.
9. Navigate to the Review Launch section. Review your instance launch details. You can go back to edit changes for each section. Click Launch to assign a key pair to your instance and complete the launch process.
10. Once it is launched, you can SSH into the server using ec2-user username. Alternatively, you can sudo su to root.
ssh -i /PATH/TO/KEY/KEY.pem ec2-user@SCRUTINIZERIPADDRESS
Changing Default Passwords
Once the appliance is deployed, we recommend changing the Admin password as soon as possible. By default the username/password will be ‘admin.’
- Log in to the Scrutinizer web console
- Click on the Admin Tab
- Click on the ‘admin’ username in the table
- Navigate to the ‘Password’ tab, input your desired password, and click Save
Adding Storage to an AMI
If you need to add disk space after the initial deployment, follow the instructions below.
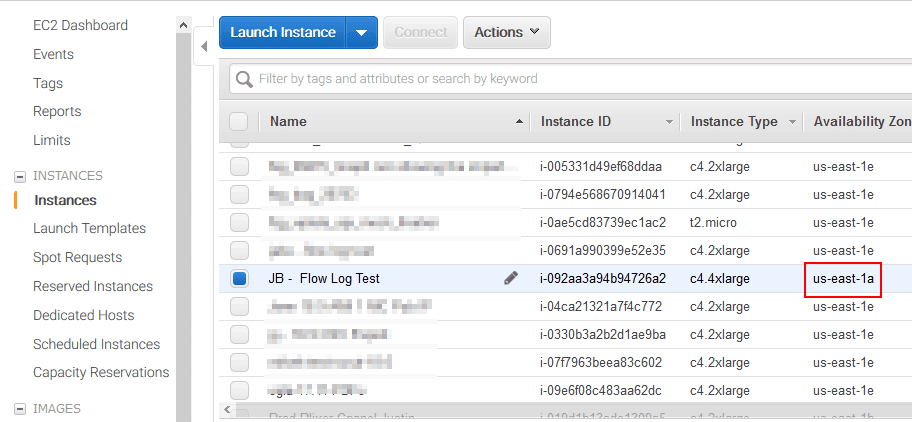
1. Find the Availability Zone of your instance from the EC2 Instance page.
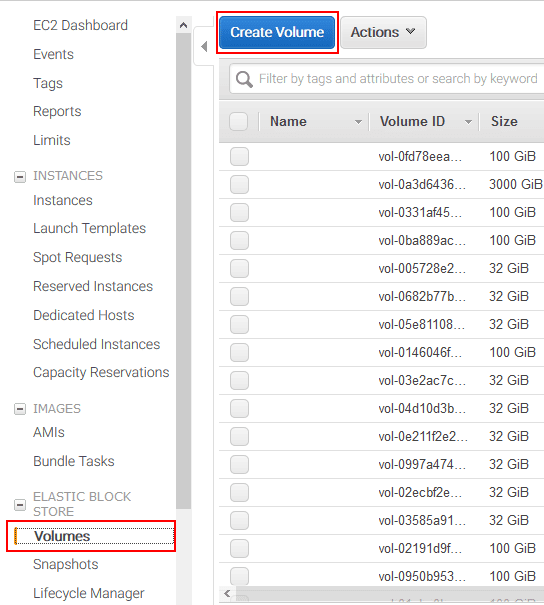
2. Navigate to the Volumes page and click on the Create Volume button in the top left.
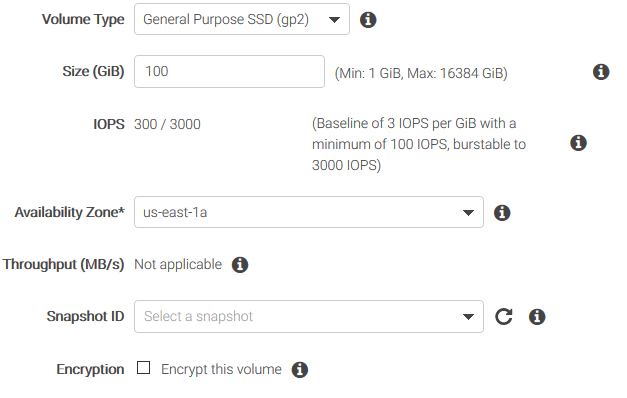
3. On the Create Volumes page, create the new volume with the desired size and in the correct Availability Zone. ALWAYS choose GP2 General Purpose SSD.
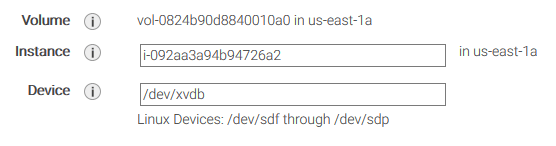
4. Next, we need to attach the new volume. Right-click on the new volume and select Attach Volume. Start typing out the name of the instance and select it from the dropdown menu. Once you have the instance selected, you will need to change the name of the volume to ‘dev/xvdb.’ Select Attach when finished.
Next you will need to expand the database partition of the Scrutinizer appliance.
- SSH into the Scrutinizer appliance.
- Next we will make sure the new volume is properly attached.
- sudo fdisk –l
- You should see a new disk called /dev/xvdb/ that is the new size.
- Log in to the Scrut_Util interactive prompt as root (sudo ./scrut_util.exe) and run the command:
- set partitions /dev/svdb
- This should expand the partition for you and restart the services. Once finished you can run the command below to show the new space:
- show diskspace
Scrutinizer AMI Wrap-Up:
If you run into any issues or have any questions on the deployment process, feel free to reach out to us for help. If you stumbled onto this blog and are not using Scrutinizer in the cloud yet, give it a try today!
Related

5 ways university networks need to shift in the post-pandemic world
It’s fall here on the east coast of the US and that means a few things. First is that the weather and leaves start